Paintmaster logo

BLog

Exterior House Painting

Exterior House Painting: What To Expect During The Process

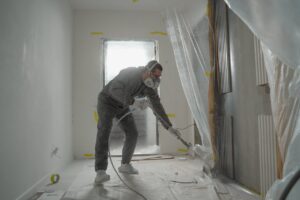
Introduction: Understanding The Exterior House Painting Process When it comes to painting the exterior of your home, it’s important to understand the process to know what to expect. From choosing the right paint to preparing the surface and applying the paint, there are several steps involved in exterior house painting. In this article, we will explore the different stages of the process, so you can be prepared and informed. Step 1: Setting Up The Work Area Setting up the work area is an essential part of the exterior house painting process. It involves clearing the area around the house, removing any furniture, and covering nearby plants and landscaping to protect them from paint splatters. The painting contractor or DIY painter will also need to set up ladders, scaffolding, and other equipment needed to access higher areas of the home’s exterior. This step is critical for ensuring a safe and efficient painting process. Step 2: Preparing The Surface The second step in the exterior house painting process is preparing the surface. This includes cleaning the surface to remove any dirt, debris, or mildew, repairing any damage or cracks, and sanding the surface to ensure the paint adheres properly. It’s also essential to prime the surface before painting to ensure the paint lasts longer and adheres better. Proper preparation is critical to achieving a professional and long-lasting paint job. Step 3: Applying The Primer After the surface has been prepped, the next step is to apply the primer. The primer serves as a base layer for the paint and provides several benefits such as better adhesion, increased durability, and improved coverage. It also helps to even out the surface, filling in any pores or imperfections, and creating a smooth surface for the paint to adhere to.  When selecting a primer, it’s essential to choose one that’s compatible with the type of paint being used and the surface it’s being applied to. Some surfaces may require a specific type of primer, such as metal or masonry surfaces, which have different properties and require different types of primers.  The primer should be applied evenly, using a brush or roller, in thin coats to avoid drips and to ensure proper adhesion. It’s important to allow the primer to dry completely before applying the paint, which can take anywhere from a few hours to overnight depending on the type of primer and the environmental conditions. Step 4: Applying The Paint Once the primer has dried completely, it’s time to apply the paint. It’s recommended to use two coats of paint for better coverage and durability. Apply the paint in a consistent and even manner using a brush, roller, or sprayer. Make sure to follow the recommended drying time between coats. When painting the surface, work in sections and paint from top to bottom. Use long strokes in the same direction to avoid visible brush or roller marks. It’s important to maintain a wet edge and avoid letting the paint dry before blending with the next section. Depending on the paint type and weather conditions, it may take several days for the paint to fully dry and cure. During this time, avoid touching or rubbing the painted surface to prevent smudging or damaging the paint. Step 5: Touch-Ups And Final Inspection After the paint has dried, the painters will inspect the job for any missed spots or imperfections. Any necessary touch-ups will be made, and a final inspection will take place to ensure that the paint job meets the homeowner’s expectations. The crew will remove any masking tape or coverings, clean up the work area, and restore any outdoor fixtures or furniture to their original locations. The homeowners will be invited to inspect the work and provide feedback, and the crew will make any final adjustments to ensure complete satisfaction. The project is considered complete once the homeowner approves the finished product. Conclusion: Achieving A Successful Exterior House Painting Achieving a successful exterior house painting requires a thorough understanding of the painting process. By following the steps involved, homeowners can ensure a professional and long-lasting result. Setting up the work area, preparing the surface, applying the primer, applying the paint, and performing touch-ups and a final inspection are all critical steps in achieving a high-quality paint job. Each step plays a significant role in the outcome of the project, so it’s crucial to take the time to complete each step correctly. By understanding and following the exterior house painting process, homeowners can ensure a successful outcome and a beautiful home exterior. Our Experts’ Take According to Paul F. Aubin, a practicing architect and author, exterior house painting can significantly enhance a home’s appearance and value, but the process can be overwhelming for some homeowners. He suggests hiring a professional painter who can ensure proper preparation, use high-quality materials, and apply the paint with the correct technique for a long-lasting and beautiful result.  Similarly, Bob Vila, a renowned home improvement expert, recommends hiring a professional painter for complex painting jobs or large houses, as they have the necessary tools and experience to handle the project efficiently. However, he also acknowledges that some homeowners may choose to tackle exterior painting on their own, in which case he advises thorough preparation and proper safety precautions.  Overall, experts suggest that homeowners carefully evaluate their skills, time, and budget before deciding whether to DIY or hire a professional for exterior house painting. They also stress the importance of proper preparation and quality materials to achieve a successful and long-lasting paint job. https://www.youtube.com/watch?v=7Eu5YcqtEWIhttps://www.youtube.com/watch?v=ame8ukzaO4A Do You Need A Professional House Painting Team You Can Trust? Refresh your home and space with the experts at PaintMasters! Since 1994, PaintMasters has been the top residential and commercial painting company in Concord, California. We proudly serve Lamorinda, Tri-Valley, Contra Costa, and the surrounding areas. With our cutting-edge technology, unparalleled expertise, and state-of-the-art 15,000 CFM spray booth, you can be sure that your cabinets will receive a top-notch finish. Our team of experienced professionals is expert in

Read More »

The Impact Of Wood Surface Painting On Property Value

Wood surface painting has a significant impact on property value. By enhancing the overall appearance, painting wood surfaces can greatly increase the desirability and marketability of a property. The condition of these surfaces is crucial in determining the value of a property, making it essential to pay attention to their treatment and maintenance. This article presents research on the effects of wood surface painting on property value. Through meticulous measurement and testing, various samples were examined under different environmental conditions. The results highlight the importance of proper painting techniques, quality materials, and resistance to external elements in preserving the aesthetic appeal and longevity of wood surfaces. Whether you are interested in improving your own home or considering selling a house, understanding the impact of wood surface painting is vital. Stay tuned as we delve deeper into this topic, providing valuable insights for homeowners and real estate professionals alike. Exterior Painting And Property Value Marketability Boost A freshly painted wood surface can have a significant impact on the marketability of a property. When potential buyers or tenants see a property with well-maintained painted wood surfaces, it becomes more appealing to them. The fresh paint gives the impression that the property has been cared for and is in good condition. As a result, properties with freshly painted wood surfaces tend to attract more interest and can sell or rent faster than those without. Curb Appeal Enhancement Painting wood surfaces can greatly enhance the curb appeal of a property. When the exterior of a house or building is painted, it instantly stands out in the neighborhood. A fresh coat of paint on wood exteriors can make the property look clean, well-maintained, and visually appealing. This enhancement in curb appeal creates a positive first impression for visitors and potential buyers. It makes them more likely to be interested in exploring further and considering the property as an option. Appraisal Value Increment Well-painted wood surfaces can contribute to an increase in the appraised value of a property. Appraisers take into account various factors when assessing the value of a property, including its overall condition and appearance. By painting wood surfaces, you are improving their aesthetic appeal, which positively influences how appraisers perceive the property’s value. With well-maintained and visually pleasing painted wood exteriors, your property may receive higher appraisal values compared to similar properties without this improvement. Return On Investment Investing in painting wood surfaces can yield a high return on investment for property owners. The cost of exterior painting is relatively low compared to other home improvement projects but has the potential to significantly increase the value of your property. By enhancing its appearance through painting, you are making it more attractive to potential buyers or tenants who are willing to pay more for a visually appealing home or building. This means that when you decide to sell or rent your property, you can expect to recoup your investment and potentially earn additional profit. Protective Benefits Of Wood Surface Painting Lifespan Extension Painting wood surfaces has several protective benefits that can greatly impact the lifespan of the wood. When wood surfaces are left untreated, they are susceptible to weathering, rot, and decay over time. However, by applying a coat of paint, these surfaces become more resistant to these damaging elements. One of the primary advantages of painting wood surfaces is that it helps protect against moisture damage. Moisture can seep into untreated wood, causing it to warp or swell. This can lead to structural issues and make the wood more prone to rotting. By painting the surface, a protective barrier is created that prevents moisture from penetrating into the wood. In addition to moisture protection, painted wood surfaces are also less likely to be damaged by insects. Certain types of insects, such as termites and carpenter ants, are attracted to untreated wood and can cause significant damage if left unchecked. However, when a wood surface is properly painted, it becomes less appealing and more difficult for insects to penetrate. Furthermore, UV rays from the sun can also take a toll on exposed wood surfaces over time. Continuous exposure to sunlight can cause fading and discoloration in untreated wood. By applying paint with UV-resistant properties, these harmful rays are blocked from reaching the surface of the wood, preserving its natural color and appearance. Regular maintenance is crucial in ensuring that painted wood surfaces continue to provide long-lasting protection. This includes periodically inspecting for any signs of wear or damage and promptly addressing them through touch-ups or reapplication of paint as needed. Wood Preservatives Effects Before painting a wooden surface, it is often recommended to use preservatives as an additional layer of protection against decay and pests. Wood preservatives are chemicals that penetrate deep into the fibers of the wood and provide long-lasting resistance against rotting and insect damage. By combining preservatives with paint on a wooden surface, a powerful defense system is created. The preservatives penetrate into the wood, strengthening its natural resistance to decay and pests. This helps to prolong the lifespan of the wood and reduce the need for frequent repairs or replacements. Preservatives can be especially beneficial in areas where wood is exposed to high levels of moisture or humidity, such as near bodies of water or in regions with heavy rainfall. These conditions create an ideal environment for rot-causing fungi and insects to thrive. By using preservatives, homeowners can effectively protect their wooden surfaces from these potential threats. It is important to note that when using preservatives, it is essential to follow the manufacturer’s instructions carefully. Some preservatives may require multiple coats or specific application techniques to ensure optimal effectiveness. Perceived Value Increase Fresh Appearance Impact Painting wood surfaces has a significant impact on the perceived value of a property. When wood surfaces are painted, they are given a fresh, vibrant, and updated look. A new coat of paint can transform worn-out or outdated wood surfaces into visually appealing features. For example, painting a weathered wooden fence can instantly make

Read More »

What’s The Best Drywall Repair Services In Contra Costa County?

About Contra Costa County And Understanding Drywall Damage Contra Costa County: A Brief Overview Contra Costa County, located in the East Bay region of the San Francisco Bay Area in California, is a diverse and vibrant community known for its rich history, scenic landscapes, and thriving urban centers. The county encompasses a variety of cities and towns, each contributing to the unique tapestry of Contra Costa. With its Mediterranean climate and proximity to major metropolitan areas, Contra Costa County offers a desirable living environment for residents. The county is home to a mix of suburban and rural areas, providing a range of lifestyles from the bustling streets of cities like Concord and Walnut Creek to the more serene settings found in places like Danville and Orinda. Understanding Drywall Damage In Contra Costa County As homeowners in Contra Costa County know, maintaining the integrity of your property is crucial to ensure a comfortable and safe living environment. One common issue that homeowners may face is drywall damage. Drywall, also known as plasterboard or wallboard, is a key component of most modern homes, providing a smooth and durable surface for interior walls and ceilings. Drywall damage can occur for various reasons, and understanding these causes is essential for effective prevention and repair. Some common factors contributing to drywall damage in Contra Costa County include: Environmental Conditions: The Mediterranean climate of Contra Costa County, characterized by dry summers and occasional heavy rains, can impact the structural integrity of drywall. Humidity changes and temperature fluctuations can lead to the expansion and contraction of materials, resulting in cracks and damage. Earthquakes: California is prone to seismic activity, and Contra Costa County is no exception. Earthquakes, even minor ones, can cause structural shifts that manifest as cracks in drywall. It’s crucial for homeowners in the region to be prepared for seismic events and to assess and repair any resulting damage promptly. Water Damage: Leaks from plumbing issues or roof problems can lead to water damage in the walls. Contra Costa County residents need to be vigilant about identifying and fixing leaks promptly to prevent not only drywall damage but also the potential for mold growth. Settling Of The Foundation: The ground in some areas of Contra Costa County may experience settling or shifting, impacting the foundation of homes. This settling can manifest in cracks in the walls and ceilings, requiring attention to maintain the structural integrity of the property. To address drywall damage effectively, homeowners in Contra Costa County should consider consulting with professionals who specialize in home repairs. Timely intervention and quality repairs can help maintain the aesthetic appeal and structural soundness of homes in this dynamic and diverse county. Why Visit Contra Costa County? Top 3 Artistic Landmarks In Contra Costa County Contra Costa County, nestled in the picturesque East Bay region of California, boasts a vibrant cultural scene that extends to its artistic landmarks. For art enthusiasts and travelers seeking cultural experiences, here are the top three artistic landmarks to visit in Contra Costa County: 1. Lindsay Wildlife Experience – Walnut Creek Nestled in the heart of Walnut Creek, California, the Lindsay Wildlife Experience stands as a unique testament to the harmonious coexistence of wildlife and artistic expression. This renowned institution seamlessly integrates education, conservation efforts, and artistic installations, creating an immersive and enlightening experience for visitors of all ages. Mission And Conservation Focus: The Lindsay Wildlife Experience is not just a typical wildlife center; it is a dynamic institution with a mission to connect people with wildlife to inspire responsibility and respect for the world we share. The center places a strong emphasis on wildlife rehabilitation, providing care for injured and orphaned animals to release them back into their natural habitats. Visitors to Lindsay Wildlife Experience can witness the dedication and compassion that goes into the rehabilitation process. Artistic Expressions Of Nature: One of the distinctive features of the Lindsay Wildlife Experience is its incorporation of artistic elements into the presentation of wildlife education. The center features captivating art installations that seamlessly blend with the natural surroundings. From intricately designed sculptures of native wildlife to vibrant murals depicting ecosystems, these artistic expressions enhance the overall learning experience. Visitors can explore the intersection of art and nature, gaining a deeper appreciation for the beauty and diversity of the animal kingdom. Interactive Exhibits And Educational Programs: Lindsay Wildlife Experience goes beyond traditional exhibits by offering interactive displays and educational programs that engage visitors of all ages. Families can participate in hands-on activities, workshops, and live demonstrations that bring the wonders of the natural world to life. Whether it’s learning about local flora and fauna or understanding the importance of conservation, the center provides a holistic educational experience that leaves a lasting impact. Community Engagement And Outreach: As a vital part of the Walnut Creek community, Lindsay Wildlife Experience actively engages with residents and visitors alike. The center hosts events, workshops, and outreach programs, fostering a sense of environmental stewardship and wildlife advocacy. Through its collaborative efforts with local artists and environmentalists, Lindsay Wildlife Experience contributes to the cultural vibrancy of Contra Costa County. Visitors to Walnut Creek seeking a unique blend of nature, art, and education will find the Lindsay Wildlife Experience to be a hidden gem. Whether marveling at the artistic representations of wildlife, participating in interactive exhibits, or supporting wildlife conservation efforts, a visit to this extraordinary center promises a meaningful and enriching experience for everyone who walks through its doors. View this post on Instagram A post shared by Temecula Tots | Lisa McGuigan (@temeculatots) View this post on Instagram A post shared by @bayareaspadonis 2. Bedford Gallery – Walnut Creek Nestled within the cultural heart of Walnut Creek, California, the Bedford Gallery stands as a dynamic and vibrant space dedicated to the celebration of contemporary art. Housed within the Lesher Center for the Arts, this gallery has become a focal point for artistic expression, fostering a connection between local and international artists and the diverse community it serves. Showcasing

Read More »

The Essential Role Of Wood Surface Painting In Custom Home Builds

Wood surface painting is a crucial step in achieving the desired aesthetics for custom home builds. By painting wood surfaces, homeowners can enhance the overall look and feel of their homes, adding a touch of elegance and sophistication. This essential stage in the construction process ensures that custom homes have a polished and finished appearance. The process of painting wood surfaces involves careful planning, from choosing the right colors to ensuring proper ventilation during the job. It is an integral part of creating a cohesive interior design that complements other elements such as doors, installations, and foundational areas. Whether it’s enhancing the natural beauty of wood grains or providing protection against water and other environmental factors, wood surface painting plays a pivotal role in transforming living spaces into personalized havens. We will delve into the key steps involved, discuss potential issues that may arise, and highlight how this trade contributes to creating stunning properties. Significance Of Wood Surface Painting Aesthetic Appeal Painting wood surfaces plays an essential role in custom home builds by enhancing their aesthetic appeal. When wood surfaces are painted, it opens up endless possibilities in terms of color and finish. This allows homeowners to choose customized paint colors and finishes that complement the overall design theme and style of their home. Whether they prefer a classic look with neutral tones or a bold and vibrant color scheme, painting wood surfaces can help achieve the desired visual effect. Not only does painting wood surfaces offer a wide range of color options, but it also creates a cohesive and visually pleasing look throughout the custom home. By carefully selecting paint colors that harmonize with other elements in the house, such as flooring or furniture, homeowners can create a seamless flow from one room to another. The right choice of paint can transform plain wooden surfaces into stunning focal points that elevate the overall ambiance of the space. Durability Enhancement Another significant benefit of painting wood surfaces in custom home builds is the enhancement of durability. Properly painted wood surfaces are more resistant to wear, tear, and damage caused by environmental factors. The application of paint acts as a protective barrier, shielding the wood from moisture, UV rays, and other elements that may cause deterioration over time. By investing in high-quality paint products and skilled craftsmanship during construction, homeowners can significantly extend the lifespan of their custom home builds. Painted wood surfaces require less maintenance compared to unfinished ones since they are better equipped to withstand daily wear and tear. This durability enhancement ensures that your custom home remains beautiful and intact for years to come. Value Addition Professionally painted wood surfaces add value to custom home builds by making them more attractive to potential buyers or tenants. When it comes time to sell or rent out your property, having well-painted exterior features can greatly increase curb appeal. The first impression is crucial when showcasing your home’s exterior, and beautifully painted wood surfaces can make a significant impact. Furthermore, investing in high-quality paint and skilled craftsmanship during construction can yield higher returns in terms of resale or rental value. Potential buyers or tenants are often willing to pay a premium for homes that have been meticulously maintained and feature appealing details such as well-painted wood surfaces. By making this investment upfront, homeowners can enjoy both the immediate aesthetic benefits and the long-term financial rewards. Wood Surface Preparation Cleaning And Sanding Before painting wood surfaces in a custom home build, it is essential to start with thorough cleaning and sanding. This step ensures that the paint adheres properly and provides a smooth finish. Cleaning involves removing dirt, dust, grease, and other contaminants that can affect the durability and appearance of the paint. By cleaning the wood surface beforehand, you create a clean canvas for a flawless paint application. Sanding is another crucial part of wood surface preparation. It helps to smooth out imperfections such as rough patches or uneven areas on the wood. Sanding also helps in creating a better bond between the wood surface and the paint. By sanding before painting, you ensure that the final result is not only visually appealing but also long-lasting. Priming Priming plays a vital role in preparing wood surfaces for painting in custom home builds. Applying primer before painting helps seal the wood surface, preventing moisture penetration that could lead to damage over time. Primer enhances paint adhesion by providing a solid base for it to adhere to. One of the benefits of using primer is its ability to even out the texture of the wood surface. Wood can have variations in porosity and grain patterns, which can affect how paint looks once applied. Primer helps create a consistent surface texture so that when you apply the final coat of paint, it appears uniform across all areas. Choosing a high-quality primer is crucial for achieving optimal results when painting wood surfaces in custom home builds. A good primer not only improves adhesion but also enhances durability and longevity. It acts as an additional protective layer between the natural wood fibers and external elements that could potentially damage them. Painting Techniques For Custom Homes Brushing Methods There are various techniques that can be employed to achieve a flawless finish. Two common brushing methods used in the process are wire brushing and nylon brushing. Wire Brushing Wire brushing is an essential technique used to prepare wood surfaces before painting. This method effectively removes loose paint, dirt, and debris from the surface, creating a clean canvas for the new coat of paint. By eliminating any impurities, wire brushing ensures better adhesion of the paint and enhances the overall appearance of the finished product. Moreover, wire brushing allows for better penetration of the paint into the wood grain. This not only improves its protective properties but also helps create a more professional-looking finish. With its ability to remove old layers of paint and provide a smooth surface, wire brushing plays a crucial role in achieving high-quality results

Read More »

Every Step Matters: Understanding The Wood Surface Painting Process

Properly painting wood surfaces is a crucial aspect of any construction or home improvement project. Whether you are an experienced business owner or a DIY enthusiast, understanding the ins and outs of the wood surface painting process can make a significant difference in achieving desirable results. This article aims to shed light on the importance of proper wood surface painting and the benefits it brings. A well-executed wood surface painting process not only enhances the aesthetic appeal of your interior or exterior areas but also provides protection against moisture, UV rays, and other environmental factors. By comprehending each step involved in this process, from preparing the surface to applying primer and paint, you can ensure long-lasting and visually pleasing outcomes. So, whether you’re tackling small touch-ups or embarking on a large-scale renovation project, this article will guide you through every step that matters. Wood Surface Painting Essentials Required Materials Before starting a wood surface painting project, it is important to gather all the necessary tools and supplies. These include different types of brushes, rollers, and other equipment needed for applying paint smoothly and evenly. It is crucial to use high-quality materials to achieve the best results. Using cheap or low-quality brushes and rollers can result in streaks and uneven coverage. Choosing Paints Paint Types There are different types of paint available that are suitable for wood surfaces. Understanding the characteristics and uses of each type can help you make an informed decision. Oil-based paints provide a durable finish but require longer drying times. Latex paints are water-based and dry quickly, making them more convenient for smaller projects. Acrylic paints offer excellent adhesion and flexibility, making them suitable for both indoor and outdoor applications. Color Bases When selecting paint for wood surfaces, it is essential to consider the variety of color bases available. The color base refers to the undertone or hue that forms the foundation of the paint color. Different color bases can have a significant impact on the final result. For example, a white color base may enhance bright colors, while a gray or beige base may mute or soften vibrant shades. Importance Of Priming Primer Types Using primers before painting wood surfaces is crucial for several reasons. Primers create a smooth surface by filling in imperfections such as cracks, knots, or holes in the wood. They also help improve adhesion between the paint and the surface, ensuring better durability and longevity of the painted finish. There are different types of primers available based on specific applications such as oil-based primers for exterior use or stain-blocking primers for covering dark stains. Tinted Primer Benefits Tinted primers offer several advantages. By tinting the primer with a similar color to the paint, it enhances color accuracy and helps achieve better coverage. Tinted primers also help in reducing the number of coats required for achieving the desired color, saving time and effort. They are particularly beneficial when transitioning from a dark to a lighter color or when using vibrant shades. Preparing The Wood Surface Cleaning Techniques Before painting a wood surface, it is crucial to ensure that it is properly cleaned. Cleaning the surface helps remove dirt, dust, grease, and other contaminants that may affect the quality of the paint job. A clean surface provides a smooth canvas for applying paint and helps achieve a professional-looking finish. There are several effective cleaning methods for wood surfaces. One common technique is to use a mild detergent mixed with water. This solution can be applied using a sponge or soft cloth and should be gently scrubbed onto the surface to remove any grime or stains. It is important to rinse the area thoroughly with clean water afterward to remove any residue from the cleaning solution. Another option for cleaning wood surfaces is to use denatured alcohol or mineral spirits. These solvents can effectively dissolve grease and oil-based contaminants without damaging the wood. They can be applied using a clean cloth, wiping in a circular motion until the surface is clean. Regardless of the cleaning method chosen, it is essential to allow sufficient time for the wood surface to dry completely before proceeding with painting. Moisture on the surface can interfere with adhesion and lead to poor paint coverage. Sanding Tips Sanding plays a critical role in preparing wood surfaces for painting by creating a smooth and even texture. To achieve optimal results, it is important to understand sandpaper grit selection and employ proper sanding techniques. When selecting sandpaper grits, consider both their purpose and the condition of the wood surface. Coarser grits such as 80 or 100 are suitable for removing old paint or varnish layers effectively. Finer grits like 220 or 320 are ideal for smoothing out rough areas or preparing bare wood surfaces. To achieve an excellent finish, it’s best to follow a sequence of sandpaper grits starting from coarse to fine progressively. This ensures that each previous grit’s scratches are smoothed out by the subsequent finer grit, resulting in a uniform surface. When sanding wood surfaces, it is essential to apply consistent pressure and use smooth, even motions. Sanding with too much force or uneven pressure can result in an uneven surface or even damage the wood. Make sure to sand along the grain of the wood for the best results. Avoid common mistakes when sanding, such as skipping grits or using worn-out sandpaper. Skipping grits can lead to visible scratches on the final paint job, while using worn-out sandpaper may not effectively smooth out imperfections. Sealing Knots Knots are natural imperfections found in wood that can affect the appearance and durability of a painted surface. To prevent knots from bleeding through the paint and causing discoloration, it is important to seal them before painting. There are various sealant options available for sealing knots on wood surfaces. One popular choice is shellac-based sealants, which provide excellent stain-blocking properties. Primer Application Strategies Selecting The Right Primer Choosing the right primer is an essential step in the wood surface painting process. Several

Read More »

What’s The Best Wood Surface Painting Services In Contra Costa County?

About Contra Costa County And Preparation For Wood Surface Painting Contra Costa County, located in the San Francisco Bay Area of Northern California, is a diverse and vibrant region known for its scenic landscapes, cultural attractions, and thriving communities. The county is home to a mix of suburban and rural areas, providing a rich blend of natural beauty and urban amenities. With a population that appreciates outdoor activities, Contra Costa County boasts numerous parks, hiking trails, and recreational opportunities. Preparation For Wood Surface Painting In Contra Costa County: If you’re considering painting wood surfaces in Contra Costa County, it’s essential to prepare adequately to ensure a durable and visually appealing finish. Whether you’re refreshing the exterior of your home, reviving a deck, or updating interior woodwork, the following steps can guide you through the preparation process: 1. Cleaning the Surface: Before applying any paint, it’s crucial to clean the wood surface thoroughly. Remove dirt, grime, and mildew using a mild detergent and water solution. Power washing can be effective for larger surfaces, but be cautious not to damage the wood with excessive pressure. 2. Sanding: Sanding helps create a smooth and even surface, promoting better adhesion of the paint. Use a medium-grit sandpaper to remove any existing finish, rough spots, or imperfections. For larger projects, consider using a power sander to save time and effort. 3. Repairing and Patching: Inspect the wood for any cracks, holes, or damaged areas. Fill these imperfections with a quality wood filler or epoxy filler, and then sand the repaired areas to blend them seamlessly with the surrounding surface. 4. Priming: Applying a primer is essential for wood surfaces, as it helps the paint adhere better and provides a more even finish. Choose a primer specifically designed for wood, and ensure it is compatible with the type of paint you plan to use. 5. Choosing the Right Paint: Selecting high-quality paint is key to achieving a long-lasting and attractive result. Consider the type of wood, the location of the surface (interior or exterior), and the desired finish. Exterior surfaces may require paint with UV protection and resistance to the elements. 6. Applying the Paint: Once the preparation is complete, apply the paint using a brush, roller, or sprayer, depending on the size and type of surface. Follow the manufacturer’s instructions regarding drying times and the number of coats needed for optimal results. 7. Sealing and Protecting: After the paint has dried completely, consider applying a clear sealant or topcoat to protect the wood surface from moisture, sunlight, and other environmental factors. This step can enhance the longevity of the paint job. Taking the time to properly prepare and paint wood surfaces in Contra Costa County will not only enhance the aesthetic appeal of your property but also contribute to the longevity of the painted surfaces in the diverse and sometimes challenging climate of the region. https://www.youtube.com/watch?v=augA31L_3Ic&t=4s Why Visit Contra Costa County? Top 3 Scenic Routes In Contra Costa County Contra Costa County, nestled in the San Francisco Bay Area, offers visitors a plethora of scenic beauty, outdoor activities, and charming destinations. If you’re a nature enthusiast or someone who appreciates picturesque landscapes, exploring the scenic routes in Contra Costa County is a must. Here are the top three scenic routes to consider: 1. Mount Diablo Scenic Byway The Mount Diablo Scenic Byway takes you on a captivating journey through Mount Diablo State Park, offering breathtaking views of the Bay Area and beyond. As you ascend the mountain, the landscape transforms, revealing a diverse array of ecosystems, including chaparral, oak woodlands, and grasslands. The summit, at 3,849 feet, provides panoramic vistas of the San Francisco Bay, the Central Valley, and the Sierra Nevada. Don’t forget to stop at various viewpoints along the way, such as the Junction Ranger Station and the Rock City area, known for its fascinating sandstone formations. View this post on Instagram A post shared by Pauline (@dreamsofpauline) View this post on Instagram A post shared by Krissia Urquilla (@urquillakrissia) 2. Briones To Mount Diablo Trail This scenic route combines the beauty of Briones Regional Park with the grandeur of Mount Diablo. Starting in Briones, you’ll encounter rolling hills, open grasslands, and groves of oak trees. The trail eventually leads to the foothills of Mount Diablo, offering hikers and nature enthusiasts an opportunity to experience the region’s diverse flora and fauna. The journey culminates at Mount Diablo State Park, where you can enjoy unparalleled views from the summit. The trail provides an immersive experience of Contra Costa County’s natural beauty, making it a favorite among outdoor enthusiasts. View this post on Instagram A post shared by Derrick Alire (@derrickalire) View this post on Instagram A post shared by Exploring SF Bay Area & Beyond (@bayarea_buzz) 3. Delta Loop The Delta Loop takes you on a scenic drive through the Sacramento-San Joaquin Delta, an expansive network of waterways, farmlands, and charming small towns. The route is dotted with levees, agricultural fields, and views of the meandering Sacramento River. As you navigate the loop, consider stopping in the historic town of Isleton, known for its rich cultural heritage and waterfront charm. The Delta Loop offers a more relaxed and bucolic experience compared to the mountainous terrain of Mount Diablo, making it an excellent choice for those seeking a different aspect of Contra Costa County’s scenic beauty. View this post on Instagram A post shared by Kayla Oxley (@koxley_) View this post on Instagram A post shared by Ravi Windom (@ravicita) Whether you’re interested in panoramic mountain views, hiking through diverse landscapes, or exploring the Delta’s serene waterways, Contra Costa County has something to offer for every nature lover. These scenic routes provide an opportunity to immerse yourself in the region’s natural wonders and create lasting memories. Best Wood Surface Painting Services For Contra Costa County Paintmasters Is The Wood Surface Painting Services You Can Trust At PaintMasters, we are renowned for our exceptional Textured Painting Services, leveraging advanced technology and unparalleled expertise. Our state-of-the-art

Read More »

The Long-Term Benefits Of Proper Wood Surface Painting

Wood surface painting offers long-term benefits for preserving and enhancing the beauty of your wooden structures. By investing in proper wood surface painting, you can significantly extend the lifespan of your wood surfaces, ensuring a durable and aesthetically pleasing finish. This article explores the advantages of proper wood surface painting, highlighting its ability to protect against elements and provide a new life to your wooden surfaces. Properly priming and painting wood surfaces not only improves their appearance but also helps prevent common problems such as rotting, warping, and fading due to exposure to moisture and sunlight. Whether it’s your home exterior, fences, or other wooden areas, taking the time to paint them correctly can make a significant difference in their longevity. Benefits Of Painting Wood Surfaces Enhanced Beauty Wood surface painting has numerous benefits, and one of the most significant advantages is the enhanced beauty it brings to your wood. When you paint a wooden surface, it not only adds color but also highlights the unique grain patterns and textures of the wood. The right choice of paint color can completely transform the appearance of your wood surfaces, adding visual appeal to any space. Whether you prefer a bold and vibrant look or a more subtle and natural aesthetic, painting allows you to customize your wood surfaces to match your desired style. By doing so, you create a cohesive look throughout your home or outdoor area. Moisture Protection Another long-term benefit of proper wood surface painting is moisture protection. When wood surfaces are exposed to moisture for extended periods, they can suffer from water damage and rot. However, by properly painting these surfaces, you create a protective barrier against moisture. The paint forms a layer that seals the wood, reducing the risk of swelling, warping, or cracking due to exposure to water. This added protection helps maintain the structural integrity of the wood over time. Scratch Resistance Painted wood surfaces are more resistant to scratches and abrasions compared to bare wood. The protective layer created by paint minimizes the visibility of scratches on your wooden structures. This means that even with regular use, your painted wood surfaces will continue looking newer for longer periods. Whether it’s furniture or flooring, painting provides an additional layer of defense against everyday wear and tear. Weather Protection Wooden structures exposed to harsh weather conditions such as UV rays, rain, and snow can deteriorate over time if left untreated. However, when you paint your wood surfaces, they become shielded against these damaging effects. Paint acts as a barrier that prevents sun bleaching and fading of the natural color of the wood. By protecting your wooden structures with paint from weather-related deterioration, you ensure their longevity and reduce the need for costly repairs or replacements. Reasons for Wood Surface Painting Long-Term Preservation Properly painted wood surfaces offer long-term preservation benefits. When you paint your wooden structures, such as fences, decks, or furniture, they are better protected from the elements. By creating a barrier between the wood and external factors like insects, fungi, and mold growth, painting helps prevent decay and damage. With regular maintenance and touch-ups, painted wood surfaces can last for many years without requiring frequent repairs or replacements. Investing in quality wood surface painting ensures that your wooden structures remain strong and sturdy over time. Natural Beauty Enhancement One of the reasons why people choose to paint their wood surfaces is to enhance their natural beauty. When you apply paint to wood, it enriches the color and texture of the material. Different types of wood have unique characteristics that can be brought out with the right choice of paint. For example, painting a piece of oak furniture can highlight its beautiful grain patterns and create visual interest. The natural beauty of wood combined with a well-chosen paint color can transform ordinary wooden structures into stunning focal points in your home or garden. Flaw Concealment Painting wood surfaces effectively conceals any imperfections that may be present in the wood. Knots, blemishes, or discolorations can be easily hidden with a coat of paint. The opaque nature of paint creates a smooth and uniform appearance on the surface, camouflaging any flaws underneath. This makes painting an excellent option if you want to give your wooden structures a flawless finish. Whether it’s an old fence with weathered boards or a piece of furniture with visible wear and tear, painting allows you to restore their appearance by covering up minor defects. In addition to these benefits, proper wood surface painting also provides protection against UV rays from the sun that can cause fading or discoloration over time. It helps maintain moisture levels within the wood by preventing excessive absorption or evaporation. Furthermore, painting allows you to personalize your wooden structures by choosing colors that match your style and preferences. Importance of Surface Preparation Paint Adhesion Properly preparing wood surfaces before painting is crucial for achieving optimal results and ensuring the long-term benefits of proper wood surface painting. One of the key reasons why surface preparation is important is because it promotes paint adhesion. When wood surfaces are properly prepared, the paint adheres strongly to the wood, preventing issues like peeling or flaking over time. This strong bond between the paint and the wood ensures that your painted surfaces will maintain their integrity even under various conditions. Durability Impact Wood surface painting not only enhances the aesthetic appeal but also significantly improves the durability of wooden structures. By applying a protective layer of paint, you create a shield against physical damage that can occur over time. This protective layer extends the lifespan of the wood and reduces maintenance needs. Properly painted wood surfaces are more resistant to weathering, moisture, and other environmental factors that can cause deterioration. Preparing Steps To ensure optimal results when painting wood surfaces, proper preparation is essential. There are several important steps involved in preparing the surface before applying paint. The first step is thorough cleaning to remove any dirt or debris from the wood

Read More »
Interior House Painter

Top 10 Mistakes To Avoid When Hiring An Interior House Painter In Danville

Are you aware that an astonishing 80% of homeowners in Danville end up making critical errors when it comes to hiring an interior house painter? The consequences of choosing the wrong painter can be dire, resulting in subpar work, wasted time, and an unnecessary surge of stress during your home renovation. Fortunately, we are here to provide you with guidance to help you sidestep these common pitfalls and ensure a successful painting experience. We’ll leave no stone unturned, delving into every aspect of the hiring process. We will equip you with the knowledge needed to identify warning signs, pose the right queries, and ultimately find the ideal painter for your project. Whether you’re contemplating a fresh coat of paint to revitalize your space or musing over a striking faux finish for your walls, the last thing you want is to commit costly errors. So, stay with us as we steer you through the essential do’s and don’ts of selecting an interior house painter in Danville. First and foremost, it’s crucial to understand that not all painters are created equal. Overlooking their credentials can lead to a world of regret. We will show you the significance of verifying their qualifications and certifications to ensure that the painter you choose is up to the task. Neglecting communication is another common misstep. We will emphasize the importance of maintaining open and clear lines of communication with your chosen painter to avoid misunderstandings and ensure your project unfolds smoothly. By the end of this guide, you will be well-prepared to navigate the intricate process of hiring an interior house painter in Danville. Say goodbye to regrettable decisions, subpar results, and project-related stress. Let us help you make the right choice and enjoy a successful painting experience. Whether you are envisioning a transformation of your living space or contemplating an artistic finish for your walls, our insights will empower you to make informed decisions and achieve the results you desire. Top 10 Mistakes To Avoid When Hiring An Interior House Painter In Danville Finding the right interior house painter can seem like a daunting task, but steering clear of these common pitfalls will help you make an informed choice: 1. Prioritize Verifying The Painter’s Credentials And Experience Before committing to an interior house painter in Danville, it’s vital to scrutinize their credentials and experience. Seek out painters with proper training and certifications to ensure their qualifications. Don’t forget to inquire about their previous projects and request samples of their work to gauge their expertise. 2. Don’t Rush Your Decision; Collect Multiple Quotes For Comparison Avoid hastily selecting the first painter you encounter. Take the time to gather quotes from several painters in Danville. This will enable you to compare pricing, services offered, and overall value. Remember that opting for the cheapest option might result in subpar quality. 3. Quality Should Trump Low Prices While cost is a factor, making your decision solely based on lower prices can lead to issues. Some painters may offer budget rates but compromise on material quality or skip essential painting steps. It’s advisable to invest in a painter who provides competitive pricing while ensuring high-quality work. 4. Ensure Proper Insurance Coverage And Licensing When engaging an interior house painter, it’s critical to verify their insurance coverage and licenses. This safeguard shields you from liability in case of accidents or damage during the painting project. Always insist on proof of insurance and licenses before finalizing your choice. 5. References And Online Reviews Matter To assess a painter’s reputation and dependability, request references from previous clients. Reach out to these references to glean insights into their experiences with the painter. Additionally, scan online reviews on platforms like Google or Yelp for a broader perspective on the painter’s track record. 6. Communication And Detailed Contracts Are Crucial Effective communication is key when hiring an interior house painter. Ensure both you and the painter are on the same page regarding your expectations, timelines, and specific requirements. It’s imperative to establish a detailed contract outlining all project aspects, including costs, materials, and deadlines. 7. Avoid Painters Who Can’t Provide A Project Timeline A dependable interior house painter should be able to furnish you with a clear timeline for project completion. This not only helps you plan accordingly but also minimizes delays and surprises. If a painter can’t or won’t provide a timeline, consider exploring other options. 8. Discuss Paint Brands, Colors, And Finishes To achieve your desired outcome, engage in a discussion with your prospective painter about specific details such as paint brands, colors, and finishes. Ensure they comprehend your vision and can accommodate your preferences. This alignment ensures a smooth start to the project. 9. Clarify Additional Services Upfront Before hiring an interior house painter in Danville, clarify any additional services you require. Don’t make assumptions that services like furniture moving or wall repairs are automatically included. Discuss these specifics with your chosen painter to ensure accurate pricing and necessary arrangements. 10. Beware Of Pressure Tactics If a painter pressures you into signing contracts or making immediate decisions without allowing you time for a thorough review, exercise caution. Take the necessary time to make an informed decision, ensuring that all contract terms and conditions are transparent and clear. Exploring Painters And Their Vital Preparation Tasks When seeking the services of an interior house painter in Danville, it is imperative to grasp the diversity of painters and the critical groundwork involved in any painting project. Let’s delve deeper into these subjects. Painter Categories Various painter types deserve consideration: Residential Painters: These experts specialize in transforming residential spaces like houses and apartments, collaborating closely with homeowners to manifest their visions. Commercial Painters: Concentrating on expansive endeavors such as office buildings, retail establishments, and dining venues, commercial painters are adept at handling intricate requirements and tight schedules. Specialized Painters: Some painters carve out niches within their field, like muralists who craft exquisite wall art or faux finishers who skillfully replicate textures such as marble or wood

Read More »
Drywall Repair

Beginner’s Guide: Understanding the Basics of Drywall Repair

Ever wondered about the ins and outs of DIY drywall repair for walls and ceilings? From beginners to products, understanding the basics of paint composition and the benefits it offers is crucial. Drywall, comprising gypsum plaster encased in paper layers, serves as a sturdy wall and ceiling material. Its fire-resistant nature, sound insulation properties, and coat make it an ideal choice for homes and buildings. Moreover, with various types like standard, moisture-resistant, and fire-resistant options available, each tailored for specific environments, delving into drywall repair becomes essential. So let’s unravel the fundamentals of drywall repair and explore how drywall compound (mud) plays a pivotal role in maintaining pristine walls. Preparing for Repair Safety Measures When dealing with drywall repairs, it’s crucial to prioritize safety steps. Always wear protective gear like gloves and goggles to shield your hands and eyes from potential harm. Handle sharp tools, drywall compound, and step with caution to prevent any injuries during the repair process. Ensuring proper ventilation in the work area is also an essential step as it helps minimize the inhalation of dust particles. To illustrate, imagine you’re about to start repairing a hole in your drywall step. Before diving into the repair work, equip yourself with sturdy gloves, protective eyewear, and step. As you handle tools such as utility knives or sandpaper, maintain a steady focus on using them safely to avoid any accidental cuts or scrapes. Moreover, ensure that there’s adequate airflow in the room by opening windows or using fans while working on the repair. Floor Protection Protecting your floor is another vital aspect when embarking on drywall repairs. To safeguard it from debris and damage during the repair process, lay down drop cloths or plastic sheets on the floor before commencing any work. You may also consider utilizing self-adhesive floor protection products for added convenience in preventing scratches or stains caused by repair materials. For instance, if you’re patching up a section of damaged drywall near the floor, spread out a durable drop cloth beneath your workspace to catch any falling debris or spills that might occur during the repair task. After completing each phase of repairing, take some time to tidy up any accumulated dust or debris on the protected floor surface. Tools and Materials Essential Tools Having the right tools is crucial for a successful project. Some essential tools include a utility knife for cutting drywall, a taping knife for applying joint compound, a sanding block for smoothing surfaces, and a screwdriver for removing or inserting screws. These tools are fundamental in addressing common issues such as holes, cracks, or dents in drywall. Other useful tools like a drywall saw, hammer, drill/driver, and measuring tape can make the repair process more efficient. It’s important to have these tools on hand before starting your project because they will help you complete the repairs effectively. For instance, using the correct taping knife ensures that joint compound is applied smoothly and evenly over seams and joints. Types of Drywall Tape Understanding the different types of drywall tape is essential when undertaking repairs. One commonly used option is paper tape, known for its strength and flexibility when repairing drywall seams. Another alternative is self-adhesive mesh tape which simplifies the taping process by eliminating the need for an initial layer of mud underneath it. Moreover, fiberglass mesh tape provides reinforcement at corners to prevent cracking—a common issue in high-traffic areas like hallways or stairwells. Each type of tape serves specific purposes based on the nature of damage being repaired—whether it’s seams or corners—and understanding their applications will ensure that your repair work holds up over time. Repairing Small Holes Patching Process To begin repairing small holes in drywall, start by removing any loose or damaged drywall around the area that needs repair. This ensures a clean surface for the patch to adhere to. Then, cut a patch of new drywall slightly larger than the damaged area. Use this patch to cover the hole and secure it in place using screws or nails, making sure it is flush with the existing wall. For example: If you’re fixing a nail hole from hanging a picture frame, you may only need a small piece of drywall as your patch. For larger holes caused by accidents or furniture bumps, you might need to create a square or rectangular patch. Sanding to Perfection After applying joint compound over the patched area, it’s crucial to sand it down using fine-grit sandpaper. This step is essential for achieving a smooth and seamless finish on your repaired wall. Be careful not to oversand as this can damage the surrounding drywall and result in an uneven surface. Moreover: Over sanding can lead to an uneven texture that stands out once painted over. Wipe away dust with a damp cloth before proceeding further; this helps ensure proper adhesion when priming and painting. Repairing Large Holes Installing Support For larger repairs, it’s crucial to install support behind the damaged area. This can be achieved by using wooden backing or metal patches. By doing so, you provide stability and prevent future cracking or sagging. It’s important to follow the manufacturer’s instructions for proper installation techniques to ensure the effectiveness of the support. When dealing with significant damage, such as large holes, installing support is essential for maintaining the structural integrity of the drywall. Without this additional reinforcement, there is a risk of continued deterioration and potential safety hazards in the long run. Cutting Drywall Patch To effectively repair large holes, start by measuring and marking the dimensions needed for the patch. Once marked, carefully use a utility knife or drywall saw to cut along these lines. The precision of your cutting will determine how well your patch fits into place without any gaps. Advanced Repair Techniques Applying Multiple Coats When repairing drywall, it’s essential to apply multiple thin coats of joint compound over the patched area. Each coat should dry completely before applying the next one. By doing this, you ensure a stronger and

Read More »
Drywall Repair

10 Surprising Benefits of Professional Drywall Repair for Your Home

Homeownership comes with its fair share of responsibilities, and maintaining the integrity of your living space is crucial for long-term comfort and aesthetics. One often overlooked aspect of home maintenance is the condition of your drywall. Professional drywall repair might seem like a mundane task, but its benefits extend far beyond mere aesthetics. In this comprehensive article, we will delve into the surprising advantages of investing in professional drywall repair for your home. 1. Enhanced Structural Stability One of the primary reasons to consider professional drywall repair is the impact it has on the structural stability of your home. Damaged drywall can compromise the overall integrity of your walls, leading to potential issues such as sagging or buckling. Professional repair ensures that any structural damage is addressed promptly, preventing further complications and maintaining the stability of your home. 2. Improved Energy Efficiency Believe it or not, the state of your drywall can significantly affect the energy efficiency of your home. Gaps, cracks, or holes in the drywall can allow air leakage, leading to energy wastage and higher utility bills. Professional drywall repair seals these openings, creating a more energy-efficient environment by preventing drafts and ensuring that your heating and cooling systems work more effectively. 3. Healthier Indoor Air Quality Damaged drywall is a breeding ground for mold and mildew, which can have detrimental effects on indoor air quality. Professional drywall repair not only fixes visible damage but also addresses any underlying issues that may contribute to mold growth. By eliminating these potential hazards, you create a healthier living environment for you and your family, reducing the risk of respiratory problems and allergies. 4. Aesthetic Appeal and Property Value While it may seem obvious, the impact of professional drywall repair on the aesthetic appeal of your home cannot be overstated. Cracks, holes, and uneven surfaces can be unsightly and detract from the overall beauty of your living space. Investing in professional repair not only restores your walls to their original beauty but also enhances the resale value of your property. Potential buyers are more likely to be attracted to a well-maintained home with flawless walls. 5. Soundproofing and Acoustic Comfort Beyond its visual impact, drywall also plays a crucial role in soundproofing and acoustic comfort within your home. Damaged or poorly installed drywall can allow sound to travel easily between rooms, leading to a noisy and disruptive living environment. Professional drywall repair ensures that your walls provide optimal sound insulation, creating a peaceful and comfortable atmosphere within your home. 6. Increased Fire Resistance Another surprising benefit of professional drywall repair is the enhancement of fire resistance. Drywall is inherently fire-resistant, but damage can compromise this quality. Professional repairs include the application of fire-resistant materials and sealants, ensuring that your walls maintain their ability to resist flames. This added protection can be crucial in safeguarding your home and buying valuable time for evacuation in the event of a fire. 7. Time and Cost Savings While some homeowners may attempt DIY drywall repairs, the benefits of hiring a professional extend beyond the quality of the work. Professionals have the experience and expertise to complete repairs efficiently, saving you time and effort. Additionally, they can identify and address underlying issues that may go unnoticed in a DIY attempt, preventing future problems that could result in costly repairs. 8. Environmental Considerations Professional drywall repair also aligns with environmental considerations. Repairing damaged drywall instead of opting for replacement reduces waste and promotes sustainability. By extending the lifespan of your existing drywall through professional repairs, you contribute to a more eco-friendly approach to home maintenance. 9. Customization and Design Flexibility When engaging professionals for drywall repair, you open up possibilities for customization and design flexibility. Whether you want to incorporate textured finishes, decorative elements, or specific paint colors, professionals can cater to your aesthetic preferences. This not only restores the functionality of your walls but also allows you to personalize your living space according to your tastes. 10. Peace of Mind and Long-Term Assurance Perhaps the most underrated benefit of professional drywall repair is the peace of mind it provides. Knowing that your home’s structural integrity is intact, and potential issues have been addressed by experts, allows you to enjoy your living space without the constant worry of hidden problems. Professional repairs often come with warranties, providing long-term assurance and protection against unforeseen issues. Conclusion In conclusion, professional drywall repair goes beyond mere cosmetic improvements, offering a myriad of surprising benefits that contribute to the overall well-being of your home. From structural stability and energy efficiency to health considerations and aesthetic appeal, the impact of investing in professional drywall repair is extensive. So, the next time you notice cracks, holes, or any form of damage to your drywall, consider the long-term advantages of seeking professional assistance. Your home deserves the care and attention that only expert drywall repair can provide. Is Your Home in Need of Expert Drywall Repair? Introducing PaintMasters, Concord, California’s premier professionals in home renovation and drywall repair. Since 1994, we’ve been revitalizing living environments, from cozy residences to dynamic commercial spaces. Our approach to drywall repair goes beyond mere patchwork; it’s about meticulously preparing your space for a seamless and polished finish. Equipped with advanced tools and techniques, we ensure results that are not only visually appealing but also enduring. At PaintMasters, our services extend beyond basic fixes. We provide comprehensive solutions that include thorough preparation processes such as sanding, sealing, and precise drywall repair, ensuring your walls are impeccably restored before any further work is done. Our skilled team, with their extensive experience in various aspects of home renovation, is dedicated to rejuvenating and transforming your space, giving it a fresh and renewed appearance. We’re committed to achieving excellence from the outset, offering you a smooth and satisfying home renovation experience. Are you prepared to revitalize your home with expert drywall repair? At PaintMasters, we’re not just about fixing walls; we’re about creating an atmosphere of quality and sophistication. Contact us

Read More »