Want to maintain a beautiful and durable exterior for your home? Proper home painting preparation is the key. By addressing common household issues before diving into your paint project, you can save both time and money in the long run.
We’ll cover various repair techniques and preparation tips to ensure that your surfaces are primed, ready for application. From covering areas with primer to addressing questions about heat and light exposure, we’ve got you covered.
So, if you’re ready to embark on your next painting adventure, buckle up! Follow our step-by-step guide to ensure that every touch of color brings new life to your home’s exterior. Get ready to transform your space while tackling those pesky household issues head-on.
Table of Contents
ToggleCommon Household Issues And Repairs
Repairing Rotted Wood With Abatron Epoxy
Dealing with rotted wood can be a common problem for many homeowners, but replacing it entirely can be costly and time-consuming. That’s where Abatron epoxy comes to the rescue! This incredible product allows you to restore rotted wood instead of tearing it out and starting from scratch.
To effectively use Abatron epoxy, follow these step-by-step instructions:
- Begin by removing any loose or decayed wood using a chisel or scraper.
- Clean the area thoroughly to ensure proper adhesion of the epoxy.
- Mix equal parts of the epoxy resin and hardener according to the manufacturer’s instructions.
- Apply the mixture generously to the rotted areas, making sure to fill all voids completely.
- Smooth out the surface using a putty knife or another suitable tool.
- Allow the epoxy to cure fully before sanding it down for a seamless finish.
The great thing about using Abatron epoxy is that it not only restores the appearance of rotted wood but also provides durability and longevity. Once repaired, your wood will be protected against further decay, ensuring a solid foundation for paint application.
Fixing Peeling Paint
Peeling paint can be an eyesore that detracts from your home’s aesthetic appeal. Understanding what causes peeling paint is crucial in addressing this issue effectively. Moisture infiltration or improper adhesion are often culprits behind peeling paint.
Here are some tips to fix peeling paint on your own:
- Start by identifying and removing any loose or flaking paint using a scraper or wire brush.
- Sand down the area gently to create a smooth surface for new paint to adhere to.
- Prime the affected area with a high-quality primer before applying new coats of paint.
- Consider different methods such as scraping, patching, or using chemical strippers depending on the extent of peeling paint.
- Always follow the manufacturer’s instructions when using chemical strippers and ensure proper ventilation.
Repairing Cracks In Plaster
Cracks in plaster can be a common household issue that requires attention before painting. It’s essential to differentiate between minor cracks that can be easily repaired and major structural issues that may require professional help.
Here are some techniques to repair small cracks in plaster:
- Start by cleaning out any loose debris or dust from the crack using a brush or vacuum.
- Apply joint compound or spackling paste into the crack using a putty knife, ensuring it fills the gap completely.
- Smooth out the surface with a damp sponge or sandpaper once the compound has dried.
- For larger cracks, reinforce them with mesh tape or plaster washers before applying joint compound for added strength.
Repairing plaster cracks is vital as it ensures a smooth surface for painting and prevents further cracking or crumbling of the plaster over time.
Repairing Window Glazing
Window glazing refers to the putty-like material used to seal glass panes within wooden frames. Over time, this glazing can deteriorate, leading to air leaks and potential water damage if left unaddressed.
To repair window glazing effectively, follow these steps:
- Begin by carefully removing old glazing putty using a heat gun or scraper without damaging the window frame or glass pane.
- Clean any remaining residue from both surfaces thoroughly.
- Consider using synthetic glazing compounds as alternatives to traditional putty for improved longevity and flexibility.
- Apply new glazing compound evenly along the edges of the glass pane, using a putty knife to create a smooth finish.
- Allow the glazing compound to dry fully before painting or sealing the window.
Steps For Interior House Painting
To achieve a beautiful and refreshed look for your home, painting the interior walls is a great way to go. But before you grab that paintbrush and start slapping on the color, it’s important to follow a step-by-step process to ensure a smooth and professional finish. Let’s dive into the key steps involved in painting the interior of your house.
1. Overview Of The Process
The first step in painting your interior walls is proper preparation. This includes cleaning surfaces, patching holes, and sanding imperfections. By taking the time to prepare your walls correctly, you’ll create a smooth canvas for applying paint.
Once your walls are prepped, it’s time to select the appropriate brushes or rollers for the job. Different surfaces may require different tools, so be sure to choose wisely. Selecting the right type of paint for each room is crucial. Consider factors such as durability, washability, and sheen when making your selection.
2. Preparation Techniques
Before diving into the actual painting process, it’s essential to prepare your walls properly. Start by cleaning all surfaces using mild soap and water or a gentle cleaner specifically designed for painted walls. This will remove any dirt or grease that could interfere with adhesion.
Next, inspect your walls for any holes or cracks and patch them up using spackle or putty. Once dry, gently sand these patched areas along with any other imperfections on your walls using fine-grit sandpaper. Sanding helps create a smooth surface for paint application while ensuring better adhesion.
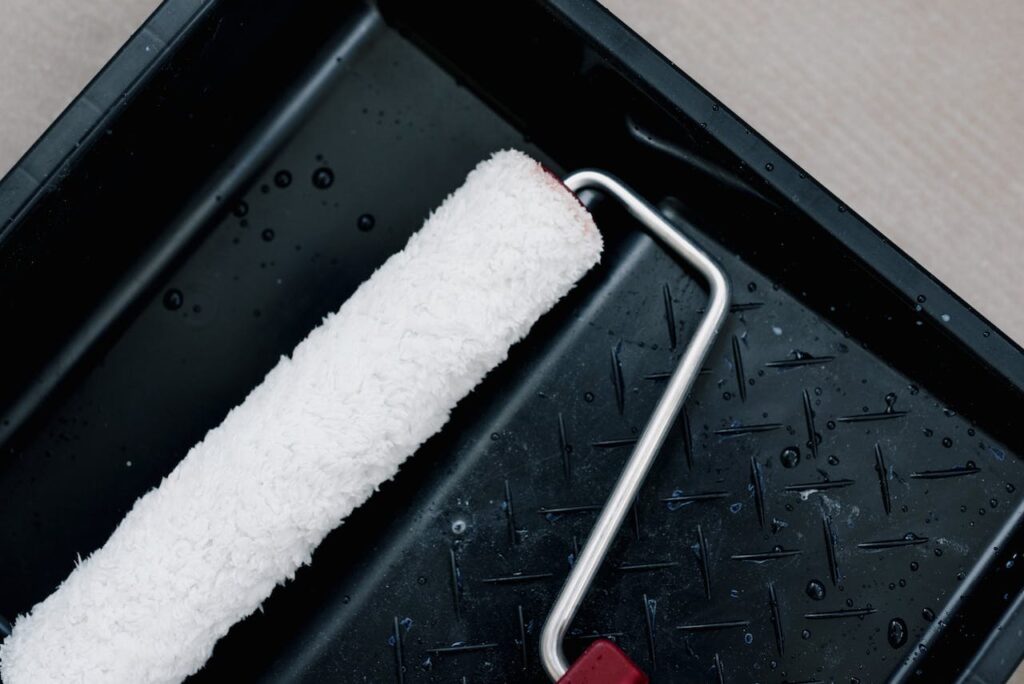
3. Choosing Brushes/Rollers & Paint Types
Consider both quality and size. High-quality brushes with synthetic bristles work well with latex paints while natural bristle brushes are ideal for oil-based paints.
For larger areas like walls and ceilings, opt for rollers instead of brushes as they provide more coverage and a smoother finish. Choose rollers with different nap lengths based on the texture of your walls. A longer nap is suitable for textured surfaces, while a shorter nap is ideal for smooth walls.
In terms of paint types, there are various options available such as latex, oil-based, and acrylic paints. Latex paints are popular due to their ease of use, quick drying time, and low odor. Oil-based paints provide a more durable finish but require longer drying times and proper ventilation due to their strong fumes. Acrylic paints offer a good balance between durability and ease of use.
4. Proper Ventilation
While painting the interior of your house, it’s crucial to ensure proper ventilation to maintain a healthy indoor environment. Open windows and doors to allow fresh air circulation during the painting process. If possible, use fans or exhaust systems to remove paint fumes from the room.
Avoid painting in enclosed spaces without ventilation as this can lead to respiratory issues or headaches caused by inhaling paint fumes for an extended period of time. Taking these precautions will help create a safe and comfortable environment while you transform your living space.
Preparing A House For Exterior Painting
Before you dive into the exciting world of house painting, it’s crucial to understand the importance of thorough surface preparation. Taking the time to properly prepare your home’s exterior surfaces will ensure a long-lasting and professional-looking paint job.
Importance Of Thorough Surface Preparation
Preparation is key. Skipping or rushing through the preparation process can lead to unsightly results and premature paint failure. Thorough surface preparation allows the paint to adhere properly, ensuring a smooth and even finish that will withstand the test of time.
Cleaning Dirt, Mildew, Or Loose Paint
The first step in preparing your house for exterior painting is cleaning the surfaces. Over time, dirt, grime, mildew, and loose paint can accumulate on your home’s exterior. To remove these impurities effectively, you have two options: power washing or hand scrubbing.
- Power washing involves using a high-pressure water spray to blast away dirt and debris from your home’s surfaces. This method is efficient and saves time but requires caution as excessive pressure can damage delicate materials.
- Hand scrubbing entails using a brush or sponge along with a mild detergent solution to manually clean the surfaces. While this method may take more time and effort, it allows for better control over delicate areas and ensures thorough cleaning.
Repairing Damaged Siding Or Trim Boards
To achieve a flawless paint job on your home’s exterior, it’s essential to address any damaged siding or trim boards before applying fresh paint. Inspect all exterior surfaces carefully for signs of rotting wood, cracks, or other forms of damage.
- Replace any severely damaged siding or trim boards with new ones to create a smooth canvas for paint application.
- Fill in smaller cracks or holes with an appropriate filler material and sand them down to create a seamless surface.
By repairing and preparing the damaged areas, you’ll not only improve the overall appearance of your home but also prevent further deterioration and potential water damage.
Protecting Surrounding Areas
During the preparation phase, it’s crucial to protect surrounding areas from overspray or drips. Paint can be messy, and you don’t want it ending up where it shouldn’t be. Here are some essential steps to ensure proper protection:
- Cover windows, doors, light fixtures, and other non-paintable surfaces with plastic sheeting or drop cloths.
- Remove any outdoor furniture or decorations that could obstruct your painting process.
- Trim back plants or bushes near the house to provide better access and prevent them from getting in the way.
Taking these precautions will save you time and effort in cleaning up later while ensuring that only the intended surfaces receive a fresh coat of paint.
Choosing Paint Colors And Sheen
Selecting the right paint colors and sheen can make a world of difference. Not only does it enhance the overall aesthetic appeal of your home, but it can also address common household issues. Let’s dive into some tips and guidance on how to choose paint colors and sheen that will complement your personal preferences and architectural style while addressing common household issues.
Selecting Paint Colors
Choosing the perfect paint color is an exciting yet challenging task. Here are some tips to help you make the right choice:
- Consider Personal Preferences: Start by considering your personal preferences. Think about the mood or atmosphere you want to create in each room. Do you prefer warm, cozy tones or cool, refreshing shades?
- Complement Your Architectural Style: Take into account the architectural style of your home when selecting paint colors. Different styles have different color palettes that work harmoniously with their design elements. For example, a Victorian-style home may look stunning with rich, deep hues, while a modern minimalist design might benefit from a more neutral color scheme.
- Lighting Conditions: Lighting plays a crucial role in how colors appear within a space. Consider both natural and artificial lighting when choosing paint colors. A color that looks vibrant in natural light might appear dull under artificial lighting conditions.
- Existing Decor: Take stock of your existing furniture, artwork, and decor items before finalizing your paint color choices. Ensure that the selected colors complement or enhance these elements rather than clash with them.
- Test Before Committing: Always test paint samples on your walls before committing to a particular color scheme. Paint swatches can look different under various lighting conditions, so it’s essential to see how they appear in your specific environment.
Exploring Different Sheen Options
Once you’ve chosen the ideal paint colors for each room, it’s time to consider the sheen or finish. Different sheen options offer various benefits and considerations:
- Matte Finish: A matte finish has a low level of shine, providing a smooth and non-reflective appearance. It is an excellent choice for hiding imperfections on walls and ceilings. However, it may not be as durable or washable as other sheen options.
- Satin Finish: A satin finish offers a subtle shine that strikes a balance between durability and aesthetics. It is easy to clean, making it suitable for high-traffic areas such as hallways, kitchens, and bathrooms.
- Glossy Finish: A glossy finish provides a high level of shine, creating a polished and vibrant look. It is highly durable and resistant to moisture, making it ideal for trim work, doors, and cabinets.
- Eggshell Finish: An eggshell finish falls between matte and satin in terms of sheen level. It offers some washability while still maintaining a smooth appearance. It works well in bedrooms, living rooms, and dining rooms.
Impact On Visual Illusions
It’s important to note that paint color choices can have an impact on creating visual illusions within spaces:
- Expanding Small Spaces: Lighter paint colors can create the illusion of more space in small rooms by reflecting light and making the area feel larger than it actually is.
- Cozying Up Large Spaces: On the other hand, darker paint colors can make large rooms feel cozier by visually bringing the walls closer together.
- Highlighting Architectural Features: Strategic use of contrasting paint colors can draw attention to architectural features such as crown molding or accent walls.
- Creating Harmony: Choosing complementary colors for adjacent rooms creates a sense of flow and harmony throughout your home.
Conclusion
Congratulations! You’ve now learned how to tackle common household issues through proper home painting preparation. By following the steps outlined in this blog post, you can transform your living space into a beautiful and vibrant haven.
Now it’s time to take action! Grab your paintbrush and start addressing those household issues head-on. Remember, Rome wasn’t built in a day, so take it one room at a time. Don’t be afraid to experiment with different colors and sheens to create the perfect ambiance for each space.
As you embark on this painting journey, keep in mind the importance of proper preparation. Just like a chef meticulously prepares ingredients before cooking up a delicious meal, preparing your home for painting ensures long-lasting results that will withstand the test of time.
So why wait? Get started today and give your home the makeover it deserves. Your friends and family will be amazed at the transformation, and you’ll feel proud every time you step into your newly painted sanctuary.
Ready For A Home Makeover With Stunning Paintwork?
Welcome to PaintMasters, Concord, California’s leading expert in home painting preparation and execution. Since 1994, we’ve been transforming living spaces, from quaint homes to bustling offices and everything in between. Our approach to painting is more than just applying a new color; it’s about preparing your space to ensure a flawless finish. With state-of-the-art tools like our 15,000 CFM spray booth, we guarantee a result that’s not just seen but felt.
At PaintMasters, we offer more than just a fresh coat of paint. Our comprehensive services include meticulous preparation steps such as sanding, priming, and drywall repair, ensuring your walls are perfectly prepped before any color is applied. Our experienced team combines their expertise in various aspects of home preparation to rejuvenate and transform your space, making it look and feel reborn. We’re committed to excellence on the first try, providing you with a smooth and enjoyable home makeover experience.
Are you ready to reinvent your home with impeccable paintwork? At PaintMasters, we’re not just about painting; we’re about creating a lasting impression of quality and beauty. Contact us today to start your journey towards a beautifully transformed home. Let’s work together to turn your vision into a reality, crafting spaces that resonate with style and elegance. Experience the PaintMasters difference – where every stroke is a step towards perfection. Get in touch now to begin your home’s transformation!
