Imagine walking into a room that instantly captivates your attention. The walls are not just flat and plain, but they possess a unique texture that adds depth and character to the space. Textured paints have the power to transform any room, creating an atmosphere that is visually intriguing and full of personality. But how do you choose the right textured paint for different room types? Discover the benefits of textured paints, learn how to test for compatibility with different surfaces, and get practical tips for selecting textured paints that enhance the appearance of your interior areas.
Table of Contents
ToggleDiscovering Textured Paints and Their Advantages
Textured paints offer both aesthetic and practical benefits. They can help hide imperfections on walls, creating a smooth and flawless finish. These paints add a unique visual appeal to any room, making it stand out from the ordinary.
One of the significant advantages of textured paints is their ability to conceal wall imperfections. Whether it’s small cracks or uneven surfaces, textured paints can effectively mask these flaws, giving your walls a clean and polished look. This makes them an excellent choice for older homes or rooms with less-than-perfect walls.
Moreover, textured paints come in various finishes, allowing you to achieve different effects based on your preferences. For instance, if you want a subtle texture that adds depth without overpowering the room’s overall design, you can opt for a fine sand-textured paint. On the other hand, if you desire a more pronounced texture that creates a bold statement, there are options available with larger granules or additives like crushed stone or glass beads.
The versatility of textured paints extends beyond just aesthetics. They also provide practical benefits such as improved durability and ease of maintenance. The added texture helps to resist stains and scuffs better than flat paint finishes. It also allows for easier touch-ups in case of minor damages since the texture helps blend in repairs seamlessly.
Identifying the Different Textures Available
It’s important to understand the various texture options available. Each texture has its own distinct appearance and application method, so knowing the differences will help you make an informed decision.
Numerous Texture Options
There are numerous texture options to choose from when selecting a textured paint. Some popular choices include sand, popcorn, and knockdown textures. These textures can give your walls a unique and visually appealing look.
Distinct Appearance and Application Method
Each texture option has its own distinct appearance and requires a specific application method. For example, sand texture creates a rough and grainy surface that adds depth to your walls. It is applied using a trowel or roller, depending on the desired effect.
On the other hand, popcorn texture creates a bumpy finish resembling popcorn kernels. This texture is typically sprayed onto the walls using specialized equipment. It can add character to any space but may require more maintenance due to its tendency to collect dust.
Lastly, knockdown texture provides a subtle yet stylish look by creating flattened peaks on the wall surface. It is achieved by applying joint compound with a trowel and then flattening it with a knife or roller.
Making an Informed Decision
Understanding the different textures available allows you to make an informed decision based on your preferences and the room type you are working with. Consider factors such as lighting, furniture style, and overall ambiance when selecting a textured paint for each room.
By carefully considering these factors and understanding the characteristics of each texture option, you can choose textured paints that enhance the aesthetics of your home while also reflecting your personal style.
Matching Texture Types to Room Functions
When choosing textured paints for different room types, it is important to consider the purpose of each room. The texture type you select can greatly impact the overall feel and functionality of a space. Here are some key points to keep in mind:
Purposeful Smoothness for Formal Areas
In formal areas such as living rooms or bedrooms, smooth textures are often preferred. These textures create a sleek and elegant look that complements the sophisticated atmosphere of these spaces. Smooth textured paints provide a clean and polished finish, adding a touch of refinement to your home decor.
Embracing Roughness in High-Traffic Areas
For high-traffic areas like hallways or children’s rooms, rougher textures may be more suitable. These textures not only add visual interest but also help to hide imperfections and withstand daily wear and tear. The roughness of the texture can make the walls more durable and less prone to damage from bumps or scratches.
By selecting textured paints that align with the function of each room, you can enhance both aesthetics and practicality. Smooth textures lend an air of sophistication to formal areas, while rougher textures offer durability in high-traffic spaces.
Remember that there are various texture options available, ranging from subtle patterns to bold designs. Consider your personal style preferences as well when making your selection.
Factors Influencing Textured Paint Selection
When choosing textured paint for different room types, there are several factors to consider. These factors will help you select the right type of textured paint that complements the overall aesthetics and atmosphere of each room.
Lighting Conditions
The lighting conditions in a room can greatly impact how textured paint appears on the walls. Rooms with ample natural light may benefit from lighter shades of textured paint as they can enhance the texture and create a sense of depth. On the other hand, rooms with limited natural light may benefit from darker shades of textured paint to add warmth and richness to the space.
Existing Decor and Furniture
Consider the existing decor and furniture in each room when selecting textured paint colors. Take into account their colors, patterns, and styles. Choose a textured paint color that harmonizes with these elements to create a cohesive look and feel throughout the space.
Personal Preferences and Desired Atmosphere
Personal preferences play an important role in choosing textured paints for different rooms. Consider your own taste and style when selecting textures that resonate with you. Think about the desired atmosphere you want to create in each room. For instance, if you want a cozy and intimate feel in your bedroom, opt for soft textures that evoke comfort.
By considering these factors – lighting conditions, existing decor, furniture, personal preferences, and desired atmosphere – you can make informed decisions when choosing textured paints for different room types. Each factor contributes to creating a unique ambiance that reflects your personal style while enhancing the overall aesthetics of your home.
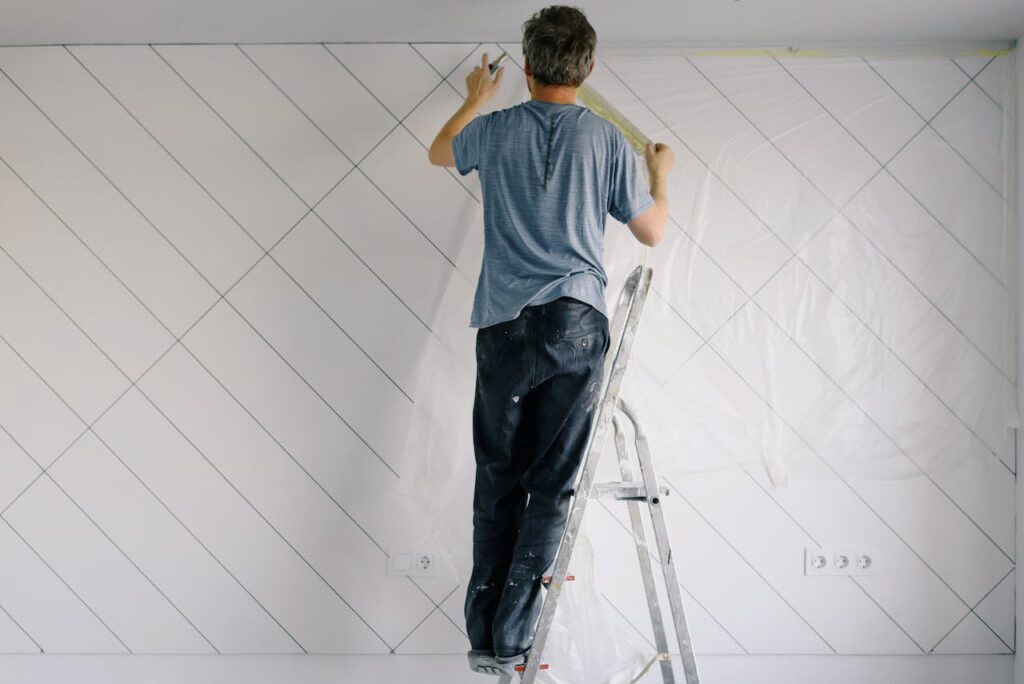
Techniques for Applying Textured Paint
There are various techniques you can use to achieve the desired results. Let’s explore some popular methods and tips for applying textured paint effectively.
Brushes, Rollers, and Specialized Tools
One of the most common techniques for applying textured paint is using brushes, rollers, or specialized tools. Different textures may require different application methods. For example, a brush can be used to create fine lines or patterns on the wall, while a roller can be effective in achieving a more uniform texture. Specialized tools like sponges or combs can also be used to create unique textures.
Experimentation is Key
To find the perfect texture for your room, don’t be afraid to experiment with different application methods. Try using different brushes or rollers, or even combine multiple techniques to create a custom texture that suits your preferences. By experimenting on a small area first before tackling the entire wall, you can get an idea of how the texture will look and make any necessary adjustments.
Practice Makes Perfect
Like any skill, practice makes perfect. If you’re new to texture painting projects, consider practicing on a scrap piece of drywall or cardboard before starting on your walls. This allows you to refine your technique and become comfortable with the tools and materials involved.
Remember that choosing the right technique depends on the type of texture you want to achieve in each room. Whether you opt for brushes, rollers, or specialized tools like sprayers or trowels will depend on your desired outcome.
Preparing Your Walls for Textured Paint
To ensure a successful application of textured paint, it’s crucial to properly prepare your walls beforehand. Here are some key steps to follow:
Clean and Repair Imperfections
Before applying textured paint, take the time to thoroughly clean your walls. Remove any dirt, dust, or grease that may be present. Inspect the surface for any imperfections such as cracks or holes. These should be repaired using spackle or joint compound and sanded smooth.
Use Primer for Better Adhesion
Priming your walls is an essential step when using textured paint. Applying a coat of primer helps create a smooth and even surface for better adhesion of the textured paint. It also helps to prevent the absorption of moisture from the paint into the wall material.
Sanding Walls
If your walls already have existing texture or bumps, sanding them can help create a more uniform surface. This step is particularly important if you’re transitioning from a previously painted wall with regular paint to textured paint. Sanding will remove any glossy finish and roughen up the surface, allowing the new texture to adhere properly.
Remember that different types of walls may require specific preparation techniques. For example, if you have drywall, it’s important to apply a base coat before adding textured paint to ensure proper adhesion and prevent damage to the drywall material.
By following these preparatory steps, you’ll create an ideal foundation for applying textured paint on your walls. Proper cleaning, repairing imperfections, priming, and sanding will result in a professional-looking finish that enhances the overall aesthetic appeal of your space.
Selecting the Right Color and Finish
When choosing textured paints for different room types, it’s important to consider the overall color scheme and finish that will best suit your space. Here are some key factors to keep in mind:
Consider the Overall Color Scheme
Take a moment to evaluate the existing color scheme of your room before selecting a textured paint color. You want to choose a shade that complements the furniture, flooring, and other elements in the space. Lighter colors, such as pastels or neutrals, can make a room feel more open and airy. On the other hand, darker hues like deep blues or rich browns can create a cozy atmosphere.
Choose the Right Finish
The finish of your textured paint can significantly impact the final look of your room. Consider both the texture you desire and how you want light to interact with it. Matte finishes work well for rooms with rough textures as they help to minimize any imperfections. Satin finishes offer a subtle sheen that adds depth to smoother textures like marble or flat surfaces.
When selecting a finish, think about durability as well. High-traffic areas may benefit from a more durable finish like satin or semi-gloss, while low-traffic spaces could do well with matte finishes.
Remember that using the right tools is essential when applying textured paint. A brush with stiff bristles is ideal for creating texture on walls, while rollers work better for larger areas.
Maximizing the Impact of Textured Paints with Lighting
To truly make the most of your textured paints and create a visually captivating space, it’s important to consider how lighting can enhance the effect. By strategically using lighting, you can highlight the texture and create interesting shadows that add depth and dimension to your walls.
Use lighting strategically to highlight the texture and create interesting shadows
Lighting is key. By placing light fixtures strategically, you can accentuate the texture on your walls and make them stand out. Consider installing track lights or wall sconces that can be directed towards the textured areas, casting unique shadows that emphasize the pattern or design.
Experiment with different types of lighting fixtures to enhance the textured effect
Don’t limit yourself to just one type of lighting fixture. Explore various options such as recessed lights, pendant lights, or even floor lamps to experiment with different angles and intensities of light. Each fixture will create a distinct effect on your textured walls, allowing you to find the perfect balance between illumination and shadow play.
Consider natural light sources and how they interact with textured walls
In addition to artificial lighting, don’t forget about natural light sources in your space. Take note of windows or skylights that bring in sunlight throughout the day. Observe how these natural light sources interact with your textured walls at different times. The changing angle of sunlight can cast beautiful shadows on your walls, enhancing their texture further.
By harnessing both artificial and natural light sources effectively, you can transform ordinary textured walls into stunning focal points within your room. Experimenting with different types of fixtures and observing how light interacts with textures will allow you to achieve a visually striking space that showcases the beauty of your chosen paint finish.
Final Steps and Maintenance for Textured Walls
Allow Sufficient Drying Time
Before applying any additional coats or finishes to your textured walls, it is crucial to allow sufficient drying time. This will ensure that the paint adheres properly and doesn’t become damaged or smudged. Follow the instructions provided by the manufacturer regarding drying times for optimal results.
Regularly Dust or Vacuum Textured Walls
To keep your textured walls looking fresh and clean, it’s important to regularly dust or vacuum them. The unique texture of these walls can sometimes accumulate dust and dirt more easily than smooth surfaces. Use a soft brush attachment on your vacuum cleaner or a microfiber cloth to gently remove any debris without damaging the texture.
Touch Up Damaged Areas
Over time, certain areas of your textured walls may get accidentally scratched or damaged. To maintain the overall appearance of your walls, it’s essential to touch up these areas as needed. Keep some extra paint in the same color as your textured walls handy for quick touch-ups whenever necessary.
Maintaining textured walls doesn’t have to be complicated. By allowing sufficient drying time, regularly dusting or vacuuming, and touching up any damaged areas, you can ensure that your textured walls continue to look their best for years to come.
Conclusion
Congratulations! You’ve now become a textured paint expert. Armed with the knowledge of different texture types, factors influencing selection, application techniques, and maximizing impact with lighting, you are well-equipped to transform any room into a stunning masterpiece. So go ahead, unleash your creativity and give your walls the textured treatment they deserve.
But remember, choosing the right textured paint is just the first step. To truly bring your vision to life, take the time to prepare your walls properly, select the perfect color and finish, and maintain your textured walls for long-lasting beauty. And don’t forget to experiment and have fun along the way!
Revitalize Your Home with Exquisite Textured Paints
Welcome to PaintMasters, the go-to specialists in textured paint applications in Concord, California. Since 1994, PaintMasters has been revolutionizing interior and exterior spaces, from cozy residences to dynamic commercial settings. Our expertise extends beyond mere color application; we focus on creating tactile experiences that transform your environment. Equipped with advanced technology like our 15,000 CFM spray booth, we ensure a textured finish that’s not only visually stunning but also tangible.
At PaintMasters, we offer an array of textured paint solutions. Our detailed preparation process, including sanding, priming, and drywall repair, guarantees that your surfaces are impeccably ready for the unique texture applications. Our skilled team, with their profound knowledge in various texturing techniques, works to rejuvenate and redefine your space, giving it a new dimension of sophistication. We are dedicated to achieving excellence on the first attempt, ensuring a seamless and delightful transformation of your home.
Are you prepared to elevate your home with our exquisite textured paints? At PaintMasters, we do more than just apply paint; we craft an atmosphere of depth and character. Reach out to us today to embark on your journey towards a home that not only looks extraordinary but feels extraordinary. Let’s collaborate to bring your vision to life, creating environments that exude style and distinction. Discover the PaintMasters difference – where every application is a step towards textural perfection. Contact us now to start the exciting transformation of your home!
