Are you tired of unsightly blemishes and imperfections on your walls? Textured paints are the ultimate solution to transform your space and achieve flawless walls effortlessly. With their unique application technique, textured paints offer a variety of ways to hide surface irregularities, cracks, and even small holes. Whether it’s an interior renovation or a commercial project, textured paints can work wonders in concealing imperfections while adding depth and character to any room. Get ready to embark on a journey towards picture-perfect walls with our expert tips and tricks.
Table of Contents
ToggleThe Allure of Textured Paints
Adding Depth and Character
Textured paints have the remarkable ability to transform a plain wall into a visually captivating masterpiece. By adding depth and character, these paints bring a unique charm to any room. Whether you’re going for a rustic, contemporary, or artistic look, textured paints offer endless possibilities.
Exploring Visual Appeal
The visual appeal of textured paints lies in their ability to create interesting patterns and finishes on walls. From subtle textures that mimic the effect of delicate brushstrokes to more pronounced textures that resemble stucco or plaster, there is a wide range of options to choose from. These textures can be achieved through techniques like color washing, faux painting, or applying different types of texture compounds.
Go-To Choice for Homeowners
Homeowners have increasingly turned to textured paints as their go-to choice for transforming their living spaces. One key reason is that textured paints can effectively hide wall imperfections such as cracks or uneven surfaces. Instead of spending time and money on extensive repairs, textured paints provide an easy solution by camouflaging these flaws.
Textured paints offer practical benefits beyond aesthetics. They are highly durable and resistant to wear and tear, making them ideal for high-traffic areas such as hallways or children’s playrooms. Moreover, they are also great for covering up stains or marks on walls.
Preparing Walls for Textured Paint Application
Before diving into the exciting world of textured paints, it’s crucial to properly prepare your walls for a successful application. Taking the time to follow these essential steps will ensure a smooth and flawless surface that will enhance the beauty of your textured paint.
Clean Your Walls
The first step in preparing your walls is to clean them thoroughly. Remove any dust, dirt, or grease using a mild detergent mixed with water. Scrub gently with a sponge or cloth, paying close attention to areas that are prone to buildup, such as kitchen walls near the stove.
Repair Wall Imperfections
Next, inspect your walls for any imperfections such as cracks, holes, or dents. Use drywall mud to fill in these blemishes and create a smooth surface. Apply the mud using a putty knife and allow it to dry completely before proceeding.
Remove Wallpaper (If Necessary)
If you have wallpaper on your walls, it’s important to remove it before applying textured paint. Use a wallpaper removal solution and follow the manufacturer’s instructions carefully. Once the wallpaper is removed, clean any adhesive residue from the wall surface.
Prime Your Walls
To ensure optimal adhesion and durability of your textured paint, apply a base coat primer to your walls. This will create an even surface and help the texture paint adhere better. Choose a primer that is specifically designed for use with textured paints.
By following these steps – cleaning your walls thoroughly, repairing any imperfections, removing wallpaper if necessary, and priming the surface – you’ll be well on your way to achieving stunning results with textured paints. So go ahead and let your creativity flow!
Selecting the Right Textured Paint and Tools
To achieve your desired look with textured paint, it is crucial to choose the right type of paint. There are different options available, each with its own unique application. By exploring these options, you can find the one that best suits your needs.
When selecting textured paint, consider the texture you want to create on your walls. Some common types include sand, popcorn, knockdown, and skip trowel textures. Each texture provides a distinct visual effect and hides imperfections in its own way. Research and compare these textures to determine which one aligns with your aesthetic preferences.
Once you have chosen the textured paint that matches your vision, it’s time to gather the necessary tools for application. While standard paint brushes can be used for some textures, certain textures may require specialized tools for better results. For example, a brush with stiff bristles might be ideal for creating a sand texture, while a trowel or roller could work better for other textures.
To ensure effective application of textured paint, invest in high-quality brushes or tools designed specifically for textured finishes. These tools will help you achieve an even distribution of paint across the surface and allow you to manipulate the texture as desired.
By carefully selecting the right textured paint and tools for your project, you can transform your walls while effectively hiding any imperfections they may have.
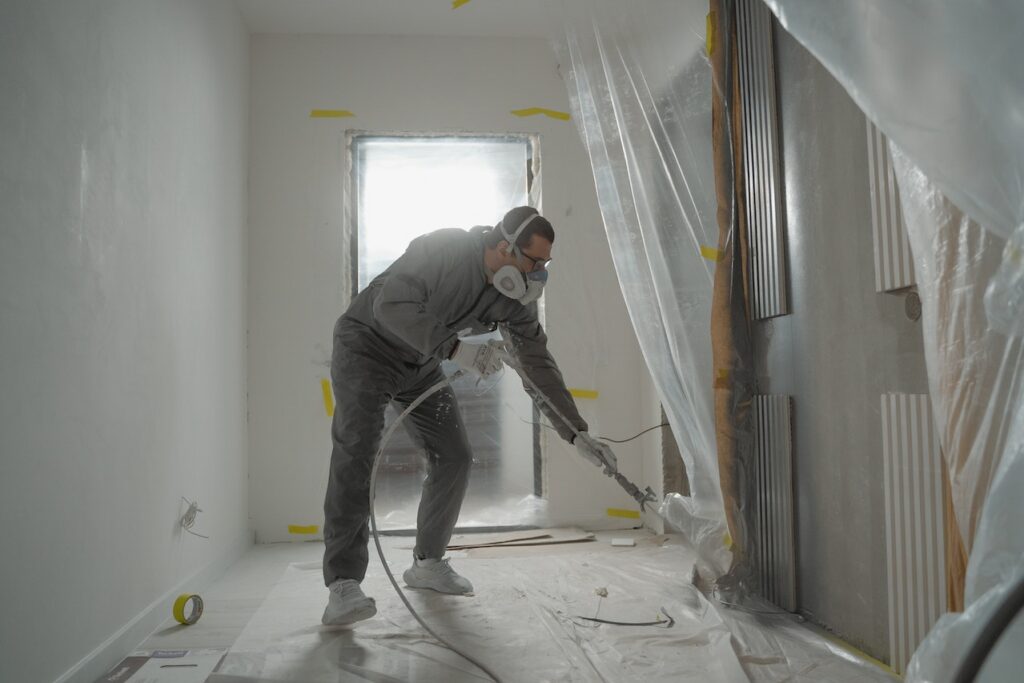
Step-by-Step Guide to Applying Textured Paint
Follow our detailed guide for a step-by-step process of applying textured paint.
Applying textured paint can be a fun and rewarding project that allows you to transform the look of your walls while also hiding imperfections. By following our step-by-step guide, you’ll learn the techniques and methods used to achieve various textures and discover insider tips for achieving professional-looking results.
Prepare the Surface
Before applying any textured paint, it’s essential to prepare the surface properly. Start by cleaning the walls thoroughly, removing any dirt, dust, or grease. Fill in any cracks or holes with spackles and sand them smooth. Once the surface is clean and dry, apply a primer to ensure proper adhesion of the textured paint.
Choose Your Texture
There are various textures you can achieve with textured paint, such as sand swirls, stippling, or knockdown. Consider the style you want to achieve and select a texture that complements your overall aesthetic.
Apply the Base Coat
Start by applying a base coat of regular latex paint in your desired color. This will serve as a foundation for your textured finish.
Mix and Apply Textured Paint
Follow the manufacturer’s instructions to mix your chosen textured paint thoroughly. Use a roller or brush to apply an even coat of textured paint onto the wall in small sections at a time. Experiment with different techniques like stippling or swirling motions to create your desired texture.
Allow Drying Time
Give each section ample drying time before moving on to avoid smudging or ruining your freshly applied texture. Refer to the product label for recommended drying times.
Mastering Texture Techniques to Conceal Imperfections
Creating a flawless-looking wall doesn’t always require extensive repairs or costly renovations. With the right texture techniques, you can effectively hide imperfections and transform your space. Let’s explore different texture techniques that will help conceal flaws and create visually appealing walls.
Explore Different Texture Techniques
Texture techniques offer a versatile way to mask wall imperfections while adding depth and visual interest to your space. Some popular options include:
- Knockdown Texture: This technique involves applying joint compound or textured paint with a trowel and then lightly knocking it down with a drywall knife, creating a mottled effect that hides imperfections.
- Skip Trowel Technique: By using a trowel to apply joint compound in sweeping motions, you can achieve an irregular texture that camouflages flaws while adding character to your walls.
- Venetian Plaster: This technique involves layering multiple thin coats of plaster, creating a smooth yet textured finish that adds elegance to any room while minimizing imperfections.
- Sponging Technique: Using a natural sea sponge or sponge roller, this method allows you to create an organic pattern by dabbing or rolling paint onto the wall, effectively disguising minor flaws.
Creating Texture Patterns
To enhance your space further while minimizing imperfections, consider incorporating specific texture patterns into your design:
- Vertical Stripes: Vertical stripes elongate the walls and draw the eye upward, making the room appear taller and diverting attention from any surface irregularities.
- Stippling:
The Role of Color and Sheen in Hiding Flaws
Color and sheen choices are crucial. By selecting the right colors and sheens, you can effectively camouflage flaws and create a visually appealing space.
Impact of Color on Hiding Flaws
Certain colors have the ability to minimize the appearance of imperfections on walls. Darker colors, such as deep blues or rich browns, tend to absorb light rather than reflect it, making any flaws less noticeable. These hues create a sense of depth that helps to distract the eye from any uneven surfaces or blemishes.
On the other hand, lighter shades can highlight imperfections by reflecting more light onto them. However, if you prefer a lighter color scheme, opting for neutral tones like beige or off-white can help mitigate the visibility of flaws while still maintaining a bright and airy feel.
Choosing the Right Sheen
The sheen of paint also plays a significant role in hiding wall flaws. Different sheens reflect light differently, which can either accentuate or diminish imperfections.
A flat or matte finish is often recommended for concealing flaws as it has minimal reflection and tends to absorb light rather than bouncing it back. This makes any inconsistencies on the surface less noticeable.
However, keep in mind that flat finishes may not be as durable or easy to clean compared to higher sheens like satin or semi-gloss. If you anticipate frequent cleaning or have high-traffic areas, consider using a slightly higher sheen that still offers some level of flaw concealment.
Ensuring a Flawless Finish with Textured Paint
To achieve a flawless finish when using textured paint, attention to detail is key. By following a few essential steps, you can ensure a smooth and even textured paint job while hiding wall imperfections. Being aware of common issues that may arise during the application process will help you troubleshoot and overcome any challenges.
Key Steps for a Smooth and Even Textured Paint Finish
- Surface Preparation: Before applying textured paint, it’s crucial to prepare the surface properly. Start by cleaning the walls thoroughly to remove any dirt or grease. Fill in any nail holes or cracks with spackle or putty and sand them down until smooth.
- Priming: Applying a primer before textured painting helps create an even surface and enhances adhesion. Choose a primer suitable for your specific project, such as one designed for kitchen cabinetry painting or covering stains.
- Choosing the Right Texture: There are various textures availableIncluding sand, popcorn, or stipple finishes. Consider the style you want to achieve and select the texture that best suits your preferences.
- Applying the Paint: Use a roller or brush specifically designed for textured surfaces to apply the paint evenly across the wall. Apply multiple thin coats rather than one thick coat to avoid drips or unevenness.
- Drying Time: Allow each coat of paint ample time to dry before applying additional layers or finishing touches. Follow the manufacturer’s instructions regarding drying times for optimal results.
Troubleshooting Common Issues
If you notice that your textured paint is clumping or sagging on the wall, it may be due to excessive thickness in certain areas.
Textured Paints vs. Traditional Paints for Wall Blemishes
Advantages of Textured Paints
Textured paints offer several advantages over traditional paints. One of the key benefits is their superior coverage and camouflage capabilities. The textured nature of these paints helps to mask minor flaws on the surface, such as dents, cracks, or uneven patches.
Superior Coverage and Camouflage
Unlike traditional flat paints that tend to highlight imperfections, textured paints create a three-dimensional effect that diverts attention away from blemishes. The textured surface adds depth and dimension to the walls, making any flaws less noticeable. This makes them an ideal choice for older homes or rooms with aging drywall that may have accumulated minor damages over time.
Cost-Effective Solution
Another advantage of using textured paints is their cost-effectiveness in concealing blemishes. Instead of investing in costly repairs or extensive wall preparations, applying a layer of textured paint can effectively hide those imperfections at a fraction of the cost. This makes it an affordable option for homeowners who want to refresh their walls without breaking the bank.
By choosing textured paints, you not only achieve a visually appealing finish but also save money by avoiding expensive repair work. These paints provide excellent coverage and camouflage abilities, effectively hiding drywall imperfections and giving your walls a fresh new look.
Maintaining Your Textured Walls Over Time
Proper maintenance is crucial for preserving the beauty of your textured walls. By following a few simple steps, you can ensure that your walls remain in pristine condition for years to come.
Cleaning and Caring for Textured Walls
To prevent damage or wear, it’s important to know how to clean and care for textured walls properly. Start by dusting the surface regularly using a soft cloth or duster. This will help remove any loose dirt or debris that may have accumulated over time.
For more thorough cleaning, use a mild detergent mixed with warm water. Gently scrub the walls with a soft sponge or cloth, being careful not to apply too much pressure as this can damage the texture. Rinse the walls with clean water and pat them dry with a towel.
Avoid using harsh chemicals or abrasive cleaners on textured walls as they can strip away the paint or alter the texture. Refrain from using excessive moisture during cleaning to prevent any potential damage.
Tips for Touch-ups and Repairs
Even with proper care, textured walls may require occasional touch-ups and repairs. Here are some tips to keep your walls looking flawless:
- For small scratches or scuffs, use touch-up paint that matches your wall color. Apply it carefully with a small brush.
- If there are larger areas of damage, consider hiring a professional painter who specializes in textured surfaces.
- Keep extra paint from the original application in case you need it for future touch-ups.
- Regularly inspect your walls for any signs of peeling paint or cracks and address them promptly to prevent further damage.
By following these maintenance tips and addressing any issues promptly, you can extend the lifespan of your textured walls while keeping them looking their best.
Conclusion
So there you have it, the secret to hiding wall imperfections: textured paints. By choosing the right textured paint, preparing your walls properly, and mastering texture techniques, you can create a flawless finish that conceals any flaws. Not only do textured paints provide a practical solution for hiding imperfections, but they also add depth and visual interest to your walls.
Now it’s time to take action! Don’t let those wall blemishes bring down the overall look of your space. Grab some textured paint and get to work transforming your walls into stunning features. With a little effort and creativity, you can achieve a flawless finish that will leave your guests in awe. So why wait? Embrace the power of textured paints and say goodbye to those pesky imperfections once and for all.
Revitalize Your Home with Exquisite Textured Paints
Welcome to PaintMasters, the go-to specialists in textured paint applications in Concord, California. Since 1994, PaintMasters has been revolutionizing interior and exterior spaces, from cozy residences to dynamic commercial settings. Our expertise extends beyond mere color application; we focus on creating tactile experiences that transform your environment. Equipped with advanced technology like our 15,000 CFM spray booth, we ensure a textured finish that’s not only visually stunning but also tangible.
At PaintMasters, we offer an array of textured paint solutions. Our detailed preparation process, including sanding, priming, and drywall repair, guarantees that your surfaces are impeccably ready for the unique texture applications. Our skilled team, with their profound knowledge in various texturing techniques, works to rejuvenate and redefine your space, giving it a new dimension of sophistication. We are dedicated to achieving excellence on the first attempt, ensuring a seamless and delightful transformation of your home.
Are you prepared to elevate your home with our exquisite textured paints? At PaintMasters, we do more than just apply paint; we craft an atmosphere of depth and character. Reach out to us today to embark on your journey towards a home that not only looks extraordinary but feels extraordinary. Let’s collaborate to bring your vision to life, creating environments that exude style and distinction. Discover the PaintMasters difference – where every application is a step towards textural perfection. Contact us now to start the exciting transformation of your home!
