Maximize Your Home’s Value: The Importance Of Home Painting Preparation
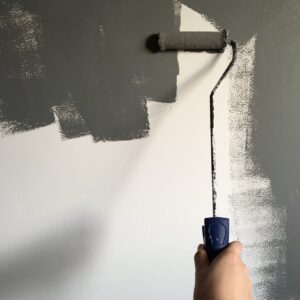
Picture this: you’ve decided to give your home a fresh coat of paint, eager to transform its appearance and increase its value. But before you embark on this exciting project, let me share a brief story with you. A few years ago, my neighbor hired a professional painter to spruce up their house. The end result? A beautiful, vibrant exterior that turned heads in the neighborhood. Curious about their secret, I asked about their approach. Their answer was simple yet crucial: proper preparation. Preparation is key to achieving a smooth and long-lasting finish. By investing time in preparing surfaces, you can prevent issues like peeling, cracking, and premature wear and tear. In other words, taking the necessary steps now will save you money on future repairs. So if you’re looking to maximize your home’s value through painting, look no further than the importance of proper preparation. Boosting Your Home’s Value Through Painting Painting your home can do wonders for its overall appearance and value. A fresh coat of paint has the power to instantly transform the look and feel of your humble abode. Whether you’re looking to update outdated colors or create a more modern aesthetic, painting is a cost-effective home improvement project that yields impressive results. Update Outdated Colors Or Create A Modern Aesthetic One of the most significant advantages of painting your home is the ability to update outdated colors. Over time, certain color schemes may become less appealing or fall out of fashion. By repainting your walls, you have the opportunity to breathe new life into each room and make it more visually appealing. Imagine walking into a room with faded, dull walls versus one with vibrant, fresh paint. The difference is striking! A well-executed painting project can completely revitalize a space and give it a modern aesthetic that will impress both guests and potential buyers. Attract Potential Buyers And Increase Property Value First impressions matter. Real estate agents often recommend painting as an essential step in preparing your property for sale. Prospective buyers are more likely to be attracted to homes that have been well-maintained and visually appealing. By investing in professional painting services before listing your home on the market, you can significantly increase its curb appeal and attract more potential buyers. A freshly painted exterior gives off an impression of cleanliness and attention to detail, making it stand out among other houses on the block. Avoid Costly Repairs With Proper Preparation Before diving headfirst into a painting project, it’s essential to prioritize proper preparation. Taking the time to clean and repair surfaces before applying new paint can save you from costly repairs down the road. Cleaning walls, removing dirt, dust, and grime ensures that the paint adheres properly and results in a smooth finish. Repairing any cracks or holes in the walls prevents further damage and guarantees a professional-looking outcome. Increasing Curb Appeal With Paint Enhancing your home’s exterior with a fresh coat of paint is a surefire way to create an inviting first impression. The appearance of your house plays a crucial role in attracting potential buyers, and choosing the right color scheme can make it stand out in the neighborhood. The walls and front door are the main areas to focus on. A well-maintained exterior not only improves the overall look of your home but also increases its value. So, let’s dive into why preparation is key. Importance Of Preparation Before you start slapping on that new coat of paint, it’s essential to prepare the surfaces properly. This step ensures that the paint adheres well and lasts longer, resulting in a professional-looking finish. Here are some reasons why preparation is so important: Smooth Surfaces: Preparing the walls by filling any cracks or holes creates a smooth surface for painting. It helps eliminate imperfections and gives your walls a flawless appearance. Long-Lasting Results: Properly prepping surfaces ensures that the paint adheres well and doesn’t peel or chip easily over time. This means less maintenance for you in the long run. Even Application: By cleaning and priming surfaces before painting, you ensure an even application of paint without streaks or blotches. This enhances the overall look of your home’s exterior. Steps For Proper Preparation Now that we understand why preparation is crucial let’s take a look at some steps you should follow to maximize your home’s value through painting: Clean: Start by thoroughly cleaning all surfaces that will be painted using soap and water or a pressure washer if necessary. Removing dirt, grime, and mildew ensures better adhesion for the new coat of paint. Repair: Inspect the walls, trim, and other surfaces for any signs of damage such as cracks or rot. Repair these issues before painting to ensure a smooth and flawless finish. Scrape And Sand: If there is any loose or peeling paint on the walls or trim, scrape it off using a scraper. Sanding the surfaces will also help create a smooth base for the new coat of paint. Prime: Applying a primer is essential, especially when painting over bare wood or previously painted surfaces with different colors. Primer helps seal the surface and provides better adhesion for the topcoat. Protect: Before you start painting, make sure to protect areas that you don’t want to be painted, such as windows, doors, and fixtures. Cover them with tape or plastic sheeting to avoid any accidental splatters. Choosing The Right Color Scheme Once you’ve properly prepped your home’s exterior, it’s time to choose the right color scheme that will enhance its curb appeal. Here are some factors to consider: Neighborhood Aesthetics: Take a look around your neighborhood and see what color schemes are prevalent. While you want your house to stand out, choosing colors that complement the overall neighborhood aesthetic can increase its appeal. Architectural Style: Consider your home’s architectural style when selecting colors. Certain styles may lend themselves better to traditional hues, while others may allow for more vibrant choices. Personal Preference: Ultimately, choose colors that resonate with your personal taste

