Paintmaster logo

DIY vs. Professional Drywall Repair: What’s Best for Your Home?

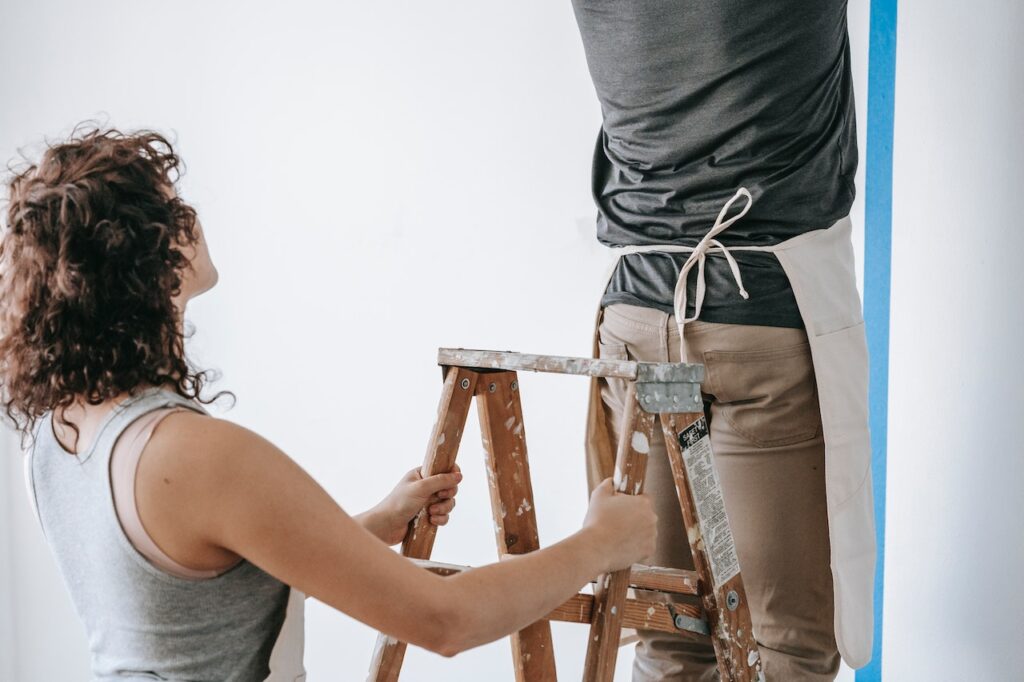
Is your home plagued by unsightly holes, water damage, surface imperfections, or issues? Understanding the significance of drywall repair, spackle and contractors are crucial to maintaining the appearance and structural integrity of your interior spaces. You’re faced with a choice: tackle the project yourself or enlist professional help. By delving into the pros and cons of each option, including costs, professional handyman, and DIY project, you can make an informed decision that aligns with your budget and the scope of the repair area. But how do you know which approach, with its costs, complexity, and potential issues, is the great option best suited for your specific needs? Let’s explore this dilemma further.

Understanding Drywall Damage and Repair

The first step is assessing the damage. Look for signs of cracks, holes, or water damage on the surface of your walls. These are indicators that your drywall needs attention.

Determining the extent of the hole, crack, and wall damage will help you decide whether it’s a minor or major repair job. Minor damages like small nail pops or hairline cracks on the wall can often be fixed with some DIY techniques. However, if you notice extensive water damage or large holes in the drywall crack, it may require professional intervention.

DIY Drywall Repair Explained

Tools Required

To start a DIY drywall repair project, you’ll need a few essential tools, including a square foot. Gather items like a putty knife, sandpaper, joint compound, wall, and square foot. It’s crucial to ensure you have everything you need, including the wall, before starting the project to avoid interruptions.

For instance:

  • Putty knife
  • Sandpaper
  • Joint compound

Step-by-Step Guide

Following a detailed guide for repairing drywall yourself can help achieve professional-looking results. Learn how to patch holes in the wall, fix cracks, and blend textures seamlessly by following step-by-step instructions available in various resources.

For example:

  1. Patching holes
  2. Fixing cracks
  3. Blending textures

Learning Skills

Attempting DIY drywall repairs presents an opportunity to acquire valuable skills and develop confidence in handling basic repairs around the house. By learning to fix minor wall issues independently, homeowners can save money while gaining practical experience in home maintenance.

Professional Drywall Repair Services

Signs for Professional Help

Recognize situations where professional handyman assistance is necessary. Identify complex repairs beyond your skill level. If you’re dealing with extensive water damage or structural problems, including wall issues, it’s best to leave it to the experts.

Complex Repairs

Understand the challenges associated with professional drywall repair. Tackle intricate issues such as extensive water damage or structural problems that require specialized expertise, including walls. Evaluate whether you have the skills and experience to handle them effectively.

Long-Term Benefits Explore the long-term advantages of professional drywall repair over DIY solutions. Enjoy durable and seamless results that last for years when you opt for professional services instead of attempting a DIY fix. Benefit from the expertise and experience of contractors who can ensure high-quality outcomes.

Cost Comparison for Drywall Repair

Estimating DIY Costs

When considering DIY drywall repair, it’s essential to calculate all potential expenses. This includes the cost of materials such as joint compound, sandpaper, and paint. Factor in the price of tools like a putty knife, sanding block, and a drywall saw. Don’t forget to account for your own time spent on the project.

Comparing these costs with hiring a professional is crucial. While DIY may seem cheaper at first glance, hidden expenses like mistakes that require redoing or purchasing additional materials can add up quickly. It’s also important to consider the value of your time – how much is an hour of your time worth?

For example:

  • A DIY repair might seem cost-effective initially but could end up being more expensive if mistakes are made.
  • Consider whether you have the necessary tools already or if you’ll need to purchase them.

Professional Service Fees

Understanding professional service fees is vital when making this comparison. Professional drywall repair services typically charge based on factors such as the size of the area needing repair and the extent of damage.

By learning about typical fees charged by professionals and how pricing is determined based on scope of work, homeowners can make an informed decision about whether investing in professional services is worth it for their specific situation.

For instance:

  • Professionals may provide a quote after assessing the damage in person.
  • The convenience and expertise offered by professionals should be weighed against their service fees.

Time Investment in Drywall Repair

DIY Time Commitment

Assessing the time required for a DIY drywall repair is crucial. Firstly, repairing drywall yourself demands a significant time commitment. You’ll need to set aside several hours or even days, depending on the extent of the damage. Consider if your schedule allows for potential delays or setbacks that may arise during the repair process. These unexpected obstacles could prolong the project and require additional time investment.

Furthermore, it’s essential to evaluate whether you have the availability to complete the project efficiently. If you have a busy schedule with work, family commitments, and other responsibilities, finding uninterrupted time for repairs might be challenging.

Professional Timeliness

On the other hand, hiring professionals can offer substantial benefits in terms of timeliness. Unlike DIY repairs that might stretch over several days due to interruptions or lack of expertise, professionals are equipped with the necessary skills and experience to complete repairs promptly.

Moreover, by opting for professional services, you can avoid prolonged disruptions to your daily life caused by ongoing repair activities at home. Professionals understand how crucial it is to finish projects within agreed timelines while ensuring high-quality results.

Pros and Cons of DIY vs. Professional Repair

Advantages of DIY

Choosing a DIY approach to drywall repair offers several benefits. First, it allows you to save money by avoiding labor costs. Instead of paying for professional services, you can invest that money in high-quality materials or tools. Completing the repair on your own can bring a sense of accomplishment and satisfaction. You get to see the direct results of your hard work and skill.

Embarking on a DIY drywall repair project also gives you the opportunity to learn new skills and gain experience in home maintenance. By taking matters into your own hands, you become more self-sufficient.

Risks of DIY

However, there are potential risks associated with DIY drywall repair that should be considered. One significant risk is the possibility of worsening the damage or creating an unsightly result if proper techniques are not followed correctly. Without adequate knowledge and experience, mistakes during the repair process could lead to additional expenses for correcting errors.

Safety hazards are another concern with DIY repairs; working with drywall materials involves handling heavy sheets as well as potentially harmful substances like joint compound or paint.

When to Choose Professional Help

Deciding when it’s best to opt for professional help depends on various factors such as complexity, time constraints, and personal skill level. If a project involves intricate details or extensive damage that requires specialized expertise, seeking professional assistance is advisable. In situations where time is limited or one lacks confidence in their abilities due to lack of experience or technical know-how, hiring professionals ensures quality results without compromising safety.

Tools and Materials for Drywall Work

Essential Tools

Having the right tools is crucial. A utility knife, taping knife, and a sanding block are essential. These tools help in cutting, applying joint compound, and sanding the repaired area.

Investing in quality tools is important as they can make the job easier and ensure better results. Quality tools also last longer, making them more cost-effective in the long run.

Materials Needed

Gathering the necessary materials before starting a drywall project is essential. You will need joint compound to fill seams and cover screws, drywall tape to reinforce joints, sandpaper for smoothing surfaces, and primer for prepping the surface before painting.

It’s important to have all these supplies on hand before beginning any repair work. Running out of materials midway through a project can be frustrating and may lead to an unfinished or poorly executed repair job.

Making the Right Choice for Your Home

Assessing your level of experience in DIY projects is crucial when deciding between DIY vs. professional drywall repair. If you have prior knowledge of drywall repair techniques, such as patching holes, applying joint compound, and sanding, then tackling the project yourself might be a viable option. However, if you’re new to home improvement tasks or lack familiarity with drywall repairs, seeking professional assistance could be the best choice.

Furthermore, it’s important to honestly evaluate whether you feel comfortable taking on the task yourself. Consider your confidence in handling tools and following through with detailed steps involved in repairing damaged drywall sections. While DIY can be a great option for those experienced in home improvement projects, it’s essential to recognize when a task may exceed your current skill set.

Conclusion

So, you’ve weighed the options for drywall repair: the DIY route or hiring a professional. Each has its perks and drawbacks, from cost considerations to time investments. Ultimately, the choice boils down to your comfort level with tackling home improvement projects and the extent of the damage. If you’re handy with tools and enjoy a good challenge, DIY might be your ticket. On the other hand, if time is of the essence or the damage is extensive, a professional could save you from a headache.

Now that you’re armed with insights into both DIY and professional drywall repair, it’s time to make an informed decision. Consider your skills, available time, budget, and the scope of the repair. Whether you pick up your tools or reach out to a pro, here’s to smooth walls and a seamless home!

Is Your Home in Need of Expert Drywall Repair?

Introducing PaintMasters, Concord, California’s premier professionals in home renovation and drywall repair. Since 1994, we’ve been revitalizing living environments, from cozy residences to dynamic commercial spaces. Our approach to drywall repair goes beyond mere patchwork; it’s about meticulously preparing your space for a seamless and polished finish. Equipped with advanced tools and techniques, we ensure results that are not only visually appealing but also enduring.

At PaintMasters, our services extend beyond basic fixes. We provide comprehensive solutions that include thorough preparation processes such as sanding, sealing, and precise drywall repair, ensuring your walls are impeccably restored before any further work is done. Our skilled team, with their extensive experience in various aspects of home renovation, is dedicated to rejuvenating and transforming your space, giving it a fresh and renewed appearance. We’re committed to achieving excellence from the outset, offering you a smooth and satisfying home renovation experience.

Are you prepared to revitalize your home with expert drywall repair? At PaintMasters, we’re not just about fixing walls; we’re about creating an atmosphere of quality and sophistication. Contact us today to embark on your journey to a beautifully restored home. Let’s collaborate to bring your vision to life, creating spaces that exude style and grace. Discover the PaintMasters difference – where every repair is a step towards excellence. Reach out now to start the transformation of your home!

More To Explore

Exterior House Painting

Exterior House Painting: What To Expect During The Process

Introduction: Understanding The Exterior House Painting Process When it comes to painting the exterior of your home, it’s important to understand the process to know what to expect. From choosing the right paint to preparing the surface and applying the paint, there are several steps involved in exterior house painting. In this article, we will explore the different stages of the process, so you can be prepared and informed. Step 1: Setting Up The Work Area Setting up the work area is an essential part of the exterior house painting process. It involves clearing the area around the house, removing any furniture, and covering nearby plants and landscaping to protect them from paint splatters. The painting contractor or DIY painter will also need to set up ladders, scaffolding, and other equipment needed to access higher areas of the home’s exterior. This step is critical for ensuring a safe and efficient painting process. Step 2: Preparing The Surface The second step in the exterior house painting process is preparing the surface. This includes cleaning the surface to remove any dirt, debris, or mildew, repairing any damage or cracks, and sanding the surface to ensure the paint adheres properly. It’s also essential to prime the surface before painting to ensure the paint lasts longer and adheres better. Proper preparation is critical to achieving a professional and long-lasting paint job. Step 3: Applying The Primer After the surface has been prepped, the next step is to apply the primer. The primer serves as a base layer for the paint and provides several benefits such as better adhesion, increased durability, and improved coverage. It also helps to even out the surface, filling in any pores or imperfections, and creating a smooth surface for the paint to adhere to.  When selecting a primer, it’s essential to choose one that’s compatible with the type of paint being used and the surface it’s being applied to. Some surfaces may require a specific type of primer, such as metal or masonry surfaces, which have different properties and require different types of primers.  The primer should be applied evenly, using a brush or roller, in thin coats to avoid drips and to ensure proper adhesion. It’s important to allow the primer to dry completely before applying the paint, which can take anywhere from a few hours to overnight depending on the type of primer and the environmental conditions. Step 4: Applying The Paint Once the primer has dried completely, it’s time to apply the paint. It’s recommended to use two coats of paint for better coverage and durability. Apply the paint in a consistent and even manner using a brush, roller, or sprayer. Make sure to follow the recommended drying time between coats. When painting the surface, work in sections and paint from top to bottom. Use long strokes in the same direction to avoid visible brush or roller marks. It’s important to maintain a wet edge and avoid letting the paint dry before blending with the next section. Depending on the paint type and weather conditions, it may take several days for the paint to fully dry and cure. During this time, avoid touching or rubbing the painted surface to prevent smudging or damaging the paint. Step 5: Touch-Ups And Final Inspection After the paint has dried, the painters will inspect the job for any missed spots or imperfections. Any necessary touch-ups will be made, and a final inspection will take place to ensure that the paint job meets the homeowner’s expectations. The crew will remove any masking tape or coverings, clean up the work area, and restore any outdoor fixtures or furniture to their original locations. The homeowners will be invited to inspect the work and provide feedback, and the crew will make any final adjustments to ensure complete satisfaction. The project is considered complete once the homeowner approves the finished product. Conclusion: Achieving A Successful Exterior House Painting Achieving a successful exterior house painting requires a thorough understanding of the painting process. By following the steps involved, homeowners can ensure a professional and long-lasting result. Setting up the work area, preparing the surface, applying the primer, applying the paint, and performing touch-ups and a final inspection are all critical steps in achieving a high-quality paint job. Each step plays a significant role in the outcome of the project, so it’s crucial to take the time to complete each step correctly. By understanding and following the exterior house painting process, homeowners can ensure a successful outcome and a beautiful home exterior. Our Experts’ Take According to Paul F. Aubin, a practicing architect and author, exterior house painting can significantly enhance a home’s appearance and value, but the process can be overwhelming for some homeowners. He suggests hiring a professional painter who can ensure proper preparation, use high-quality materials, and apply the paint with the correct technique for a long-lasting and beautiful result.  Similarly, Bob Vila, a renowned home improvement expert, recommends hiring a professional painter for complex painting jobs or large houses, as they have the necessary tools and experience to handle the project efficiently. However, he also acknowledges that some homeowners may choose to tackle exterior painting on their own, in which case he advises thorough preparation and proper safety precautions.  Overall, experts suggest that homeowners carefully evaluate their skills, time, and budget before deciding whether to DIY or hire a professional for exterior house painting. They also stress the importance of proper preparation and quality materials to achieve a successful and long-lasting paint job. https://www.youtube.com/watch?v=7Eu5YcqtEWIhttps://www.youtube.com/watch?v=ame8ukzaO4A Do You Need A Professional House Painting Team You Can Trust? Refresh your home and space with the experts at PaintMasters! Since 1994, PaintMasters has been the top residential and commercial painting company in Concord, California. We proudly serve Lamorinda, Tri-Valley, Contra Costa, and the surrounding areas. With our cutting-edge technology, unparalleled expertise, and state-of-the-art 15,000 CFM spray booth, you can be sure that your cabinets will receive a top-notch finish. Our team of experienced professionals is expert in

The Impact Of Wood Surface Painting On Property Value

Wood surface painting has a significant impact on property value. By enhancing the overall appearance, painting wood surfaces can greatly increase the desirability and marketability of a property. The condition of these surfaces is crucial in determining the value of a property, making it essential to pay attention to their treatment and maintenance. This article presents research on the effects of wood surface painting on property value. Through meticulous measurement and testing, various samples were examined under different environmental conditions. The results highlight the importance of proper painting techniques, quality materials, and resistance to external elements in preserving the aesthetic appeal and longevity of wood surfaces. Whether you are interested in improving your own home or considering selling a house, understanding the impact of wood surface painting is vital. Stay tuned as we delve deeper into this topic, providing valuable insights for homeowners and real estate professionals alike. Exterior Painting And Property Value Marketability Boost A freshly painted wood surface can have a significant impact on the marketability of a property. When potential buyers or tenants see a property with well-maintained painted wood surfaces, it becomes more appealing to them. The fresh paint gives the impression that the property has been cared for and is in good condition. As a result, properties with freshly painted wood surfaces tend to attract more interest and can sell or rent faster than those without. Curb Appeal Enhancement Painting wood surfaces can greatly enhance the curb appeal of a property. When the exterior of a house or building is painted, it instantly stands out in the neighborhood. A fresh coat of paint on wood exteriors can make the property look clean, well-maintained, and visually appealing. This enhancement in curb appeal creates a positive first impression for visitors and potential buyers. It makes them more likely to be interested in exploring further and considering the property as an option. Appraisal Value Increment Well-painted wood surfaces can contribute to an increase in the appraised value of a property. Appraisers take into account various factors when assessing the value of a property, including its overall condition and appearance. By painting wood surfaces, you are improving their aesthetic appeal, which positively influences how appraisers perceive the property’s value. With well-maintained and visually pleasing painted wood exteriors, your property may receive higher appraisal values compared to similar properties without this improvement. Return On Investment Investing in painting wood surfaces can yield a high return on investment for property owners. The cost of exterior painting is relatively low compared to other home improvement projects but has the potential to significantly increase the value of your property. By enhancing its appearance through painting, you are making it more attractive to potential buyers or tenants who are willing to pay more for a visually appealing home or building. This means that when you decide to sell or rent your property, you can expect to recoup your investment and potentially earn additional profit. Protective Benefits Of Wood Surface Painting Lifespan Extension Painting wood surfaces has several protective benefits that can greatly impact the lifespan of the wood. When wood surfaces are left untreated, they are susceptible to weathering, rot, and decay over time. However, by applying a coat of paint, these surfaces become more resistant to these damaging elements. One of the primary advantages of painting wood surfaces is that it helps protect against moisture damage. Moisture can seep into untreated wood, causing it to warp or swell. This can lead to structural issues and make the wood more prone to rotting. By painting the surface, a protective barrier is created that prevents moisture from penetrating into the wood. In addition to moisture protection, painted wood surfaces are also less likely to be damaged by insects. Certain types of insects, such as termites and carpenter ants, are attracted to untreated wood and can cause significant damage if left unchecked. However, when a wood surface is properly painted, it becomes less appealing and more difficult for insects to penetrate. Furthermore, UV rays from the sun can also take a toll on exposed wood surfaces over time. Continuous exposure to sunlight can cause fading and discoloration in untreated wood. By applying paint with UV-resistant properties, these harmful rays are blocked from reaching the surface of the wood, preserving its natural color and appearance. Regular maintenance is crucial in ensuring that painted wood surfaces continue to provide long-lasting protection. This includes periodically inspecting for any signs of wear or damage and promptly addressing them through touch-ups or reapplication of paint as needed. Wood Preservatives Effects Before painting a wooden surface, it is often recommended to use preservatives as an additional layer of protection against decay and pests. Wood preservatives are chemicals that penetrate deep into the fibers of the wood and provide long-lasting resistance against rotting and insect damage. By combining preservatives with paint on a wooden surface, a powerful defense system is created. The preservatives penetrate into the wood, strengthening its natural resistance to decay and pests. This helps to prolong the lifespan of the wood and reduce the need for frequent repairs or replacements. Preservatives can be especially beneficial in areas where wood is exposed to high levels of moisture or humidity, such as near bodies of water or in regions with heavy rainfall. These conditions create an ideal environment for rot-causing fungi and insects to thrive. By using preservatives, homeowners can effectively protect their wooden surfaces from these potential threats. It is important to note that when using preservatives, it is essential to follow the manufacturer’s instructions carefully. Some preservatives may require multiple coats or specific application techniques to ensure optimal effectiveness. Perceived Value Increase Fresh Appearance Impact Painting wood surfaces has a significant impact on the perceived value of a property. When wood surfaces are painted, they are given a fresh, vibrant, and updated look. A new coat of paint can transform worn-out or outdated wood surfaces into visually appealing features. For example, painting a weathered wooden fence can instantly make