DIY drywall repair may seem like a cost-effective idea, but it comes with hidden dangers such as seams, holes, fasteners, and sand. Understanding the risks, cost, and knowledge associated with tackling such projects is crucial. Before diving into DIY drywall repair, having knowledge about holes and cost can save both time and money in the long run. From dealing with inch-sized holes to knowing how to address problem areas, technicians must be aware of these pitfalls for a successful outcome. In this post, we’ll explore the addition of insight into these potential hazards, such as holes, and provide valuable tips on navigating through them effectively.
Table of Contents
ToggleUnderstanding Drywall Repair Risks
Health Hazards
DIY drywall repair of holes poses health hazards due to exposure to harmful substances like dust and mold. Breathing in drywall dust from inch-sized holes can lead to respiratory issues and other health problems. It’s crucial to take proper precautions, such as wearing a mask and using adequate ventilation, to protect your health during the repair process.
Exposure to mold during DIY drywall repair can also pose significant health risks when repairing a hole. Mold spores released during the repair process can cause allergies, asthma exacerbation, or even more severe respiratory conditions. Therefore, it’s essential to inspect for any signs of mold growth before initiating any repairs.
- Breathing in drywall dust
- Exposure to mold spores
- Proper precautions: mask and ventilation
Structural Concerns
One of the risks associated with DIY drywall repair is overlooking underlying structural issues that require professional attention. Ignoring these concerns could lead to further damage and costly repairs down the line. Always assess the structural integrity of the wall before attempting DIY repairs; this ensures that any hidden issues are addressed promptly.
For instance, a small crack on the surface might indicate more extensive damage within the wall structure itself. Failing to address these underlying problems may result in recurring issues or even compromise your home’s stability over time.
- Overlooking structural issues
- Assessing structural integrity
- Potential hidden damages
Quality Assurance
Achieving professional-quality results with DIY drywall repair can be challenging due to lack of experience and skill which may result in subpar finishes and visible imperfections. Considering hiring a professional for better quality assurance is advisable as their expertise ensures long-lasting results compared with amateur attempts at repairing drywalls.
Professional contractors possess specialized tools and techniques that enable them not only fix existing damages but also prevent future ones from occurring through high-quality workmanship.
Recognizing Common Drywall Damage
Water Damage
DIY drywall repair without addressing water damage can lead to recurring issues. Moisture trapped behind repaired walls can cause mold growth and further deterioration. Properly identifying and addressing water damage is crucial for successful drywall repair.
For example, if a leaky roof has caused water damage to the ceiling drywall, simply patching the affected area without fixing the source of the leak will result in ongoing problems.
Structural Cracks Failing to address underlying causes of cracks can result in recurring issues after DIY repairs. Superficially repairing cracks without fixing their root causes may lead to further wall damage. Understanding the different types of structural cracks is essential for effective DIY repair.
For instance, vertical cracks could indicate a settling foundation issue that needs professional attention rather than just a simple patch-up job.
Cosmetic Issues
DIY drywall repair may result in visible seams, uneven textures, or mismatched paint. Achieving a seamless finish requires skill and experience that may be lacking in DIY projects. Consider the potential cosmetic issues before attempting DIY drywall repair.
In some cases, even if you manage to fix a hole or crack properly, blending it seamlessly with the rest of the wall’s texture and color might prove challenging without professional expertise.
The DIY Drywall Repair Process
Essential Tools
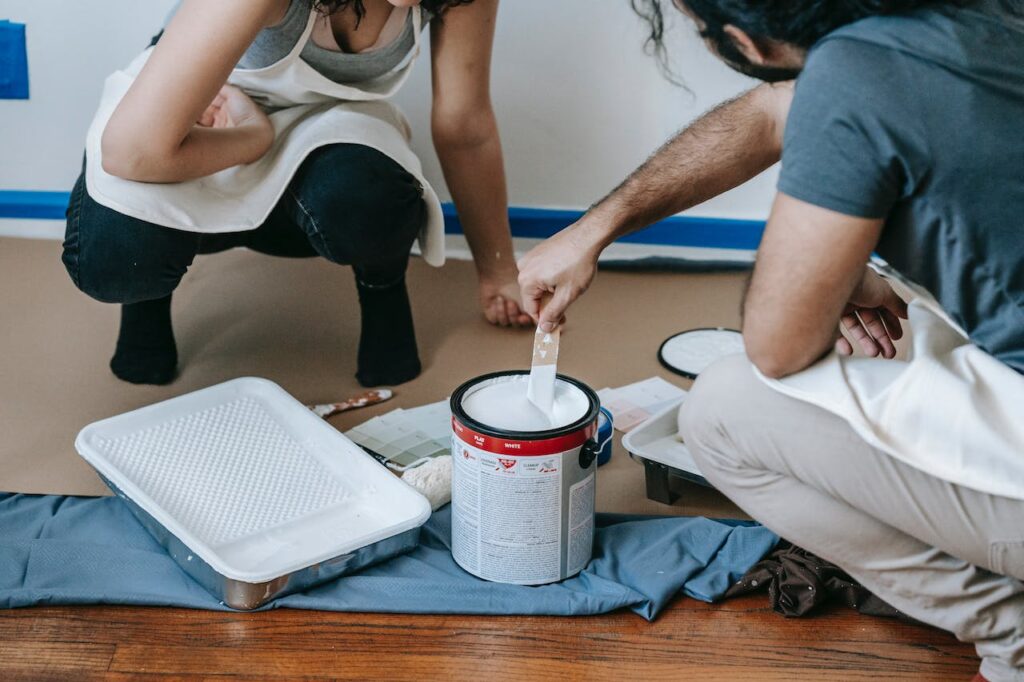
Having the right tools is crucial. Basic items like a utility knife, taping knife, and sanding block are essential for the job. Investing in quality tools can make the repair process smoother and more efficient. For instance, using a high-quality taping knife ensures that the drywall tape adheres properly without creating air bubbles or wrinkles.
It’s important to have a good-quality utility knife for precise cutting of drywall tape and joint compound application. These tools not only facilitate the repair process but also contribute to achieving a professional-looking result.
Repair Steps
Understanding the step-by-step process of drywall repair is vital for DIY success. Properly preparing the damaged area by removing loose debris and applying self-adhesive mesh tape or paper tape before adding joint compound is crucial. Sanding down any excess compound ensures a smooth finish.
Following these steps systematically results in an even surface that seamlessly blends with surrounding walls, preventing noticeable imperfections after completing the DIY drywall repair project.
Finishing Touches
Paying attention to finishing touches like feathering edges and blending textures is important. Neglecting these details can result in visible imperfections after completing your project. Taking time during this phase will help achieve a seamless transition between repaired areas and existing walls, ensuring an aesthetically pleasing outcome.
Identifying Poor Drywall Work
Visual Inspection
Before starting any DIY drywall repair, it’s crucial to conduct a thorough visual inspection of the damaged area. Look for signs of water damage, mold growth, or structural issues that may require professional intervention. By doing this, you can ensure that all necessary repairs are addressed during the project. For instance, if there are indications of water damage behind the drywall, it’s important to address the source of the issue before making any repairs.
A careful examination helps in identifying any hidden damage that might not be immediately visible. This could include underlying structural issues or compromised integrity due to previous poor repair work. By being vigilant during your visual inspection, you can avoid overlooking critical problems and ensure a comprehensive approach to your DIY drywall repair project.
Texture Matching
One common challenge with DIY drywall repair is matching the texture of repaired areas with existing walls. Achieving an accurate match can be tricky for inexperienced individuals. Different techniques like stippling or using texture sprays may be required for a seamless blend between old and new surfaces.
To overcome this hurdle, practice on scrap pieces or inconspicuous areas before attempting texture matching on visible walls. This allows you to refine your technique and achieve a better match before working on prominent sections of the wall.
Health and Safety in Drywall Repair
Dust Management
Drywall repair often generates hazardous dust that can pose health risks if not managed properly. To minimize exposure, use plastic sheeting to seal off the work area, wear a dust mask, and ensure adequate ventilation. Regularly cleaning up dust during the repair process is crucial for maintaining a safe and tidy work environment.
When sanding drywall or mixing joint compound, fine particles of gypsum are released into the air. Inhaling these particles can irritate the respiratory system and cause discomfort. By implementing proper dust management techniques, such as using a shop vac with a HEPA filter to clean up debris, you can significantly reduce the risk of inhaling harmful particles.
- Use plastic sheeting to seal off the work area
- Wear a dust mask for protection
- Ensure adequate ventilation in the workspace
Mold Dangers
Undetected mold in areas undergoing DIY drywall repair poses significant dangers. Disturbing mold-infested drywall releases spores into the air, potentially exacerbating existing mold problems within your home. Properly identifying and addressing mold issues before commencing repairs is essential for ensuring a safe restoration process.
If you suspect mold growth during your DIY drywall repair project, it’s advisable to consult with a professional who can assess and address any potential mold contamination effectively.
- Properly identify any existing mold issues
- Consider consulting a professional if there’s suspicion of mold growth
Protective Gear
Wearing appropriate protective gear such as gloves, safety goggles, and masks is imperative when undertaking DIY drywall repair projects. Prioritizing personal safety by utilizing suitable protective gear ensures a safer working environment throughout every phase of the repair process.
When to Call a Professional
Assessing Damage Severity
Understanding the severity of damage is crucial in determining whether DIY repair is feasible. Extensive or structural damage may necessitate professional intervention instead of DIY efforts. Accurately assessing damage severity prevents wasted time and resources on ineffective repairs.
For example, small cracks or minor holes can often be addressed with basic skills and tools commonly found in a DIY toolkit. However, if the damage involves large sections of the wall, water damage, or compromised structural integrity, it’s essential to seek professional assistance.
Even though you might be tempted to tackle certain repairs yourself, recognizing when a project surpasses your abilities can save time and prevent additional issues down the line.
Specialized Techniques
Some drywall repairs may demand specialized techniques beyond basic skills. Complex repairs like fixing large holes or repairing curved surfaces may be better left to professionals who possess the necessary expertise and equipment for such tasks.
For instance, matching textures on walls after repairing significant damages requires skill and experience that many homeowners might not have. Professionals have honed these specialized techniques through years of practice and are equipped to deliver high-quality results that seamlessly blend with existing surfaces.
Recognizing your limitations ensures that you don’t inadvertently worsen the initial problem by attempting repairs beyond your capabilities.
Long-Term Solutions
When engaging in DIY drywall repair, it’s important to aim for long-term solutions rather than quick fixes. Addressing underlying causes of damage ensures lasting results and minimizes future repairs. Consulting professionals for expert advice on long-term solutions can provide valuable insights into preventing recurring issues.
Avoiding DIY Pitfalls
Sanding Mistakes
Improper sanding techniques can result in uneven surfaces and visible imperfections. Take care to sand evenly, feathering edges for a seamless finish after joint compound application. Practice proper sanding techniques to avoid common mistakes during DIY drywall repair.
When sanding, ensure that the pressure is even across the surface to prevent uneven spots. Feather the edges by gradually reducing pressure towards the outer edges of the patch or repair area. This helps create a smooth transition between the repaired section and the existing wall, preventing noticeable bumps or ridges.
Ignoring Structural Issues
Failing to address underlying structural issues can lead to recurring problems after DIY repairs. Consult professionals if you suspect significant structural damage before attempting repairs yourself. Ignoring structural issues may compromise the integrity of your walls and pose safety risks.
If you notice cracks, bulging areas, or other signs of potential structural problems, it’s crucial to have them assessed by a professional before proceeding with any DIY repairs. Addressing these issues promptly will help prevent future complications and ensure that your repairs are effective in the long term.
Inadequate Prep Work
Rushing through or neglecting proper preparation can lead to subpar DIY drywall repairs. Thoroughly clean, prime, and seal damaged areas before applying joint compound for better adhesion. Investing time in adequate prep work ensures more successful repairs.
Before applying joint compound, make sure that all dust and debris are removed from the damaged area using a damp cloth or sponge. Then apply primer specifically designed for damaged drywall areas to promote better adhesion of the joint compound.
Water Damage Specifics
Identifying Moisture Sources
Identifying and addressing moisture sources is crucial for preventing future damage. Leaks or condensation issues should be resolved before attempting DIY drywall repair. Failure to address these moisture sources may result in recurring damage and mold growth.
For example, if you notice a water stain on the ceiling, it’s essential to investigate the source of the leak before repairing the drywall. It could be due to a leaking roof, plumbing issue, or even poor ventilation causing condensation buildup.
Taking proactive steps like fixing leaks or improving ventilation can minimize potential future damage after completing DIY repairs. By addressing these issues beforehand, you’ll avoid having to redo your repairs due to ongoing water damage.
Preventive Measures
Consider installing moisture barriers or improving ventilation as preventive measures against future damage. These steps are crucial in protecting your walls from potential issues after DIY repairs.
Consulting professionals for expert advice on specific preventive measures tailored to your situation can provide valuable insights into protecting your home from further water damage.
By taking these precautions before embarking on any DIY project, you’re ensuring that your efforts will stand the test of time without being compromised by underlying moisture problems.
Health Implications
DIY drywall repair without proper precautions can have health implications due to dust and mold exposure. Protecting yourself from harmful substances is essential for a safe repair process.
Wearing protective gear such as masks and gloves while working with drywall materials is vital for minimizing health risks associated with dust inhalation and skin irritation. Prioritize your health by following recommended safety guidelines during DIY drywall repair.
Dos and Don’ts for Effective Repair
Best Practices
Familiarizing yourself with best practices is crucial. Researching techniques, watching tutorials, and seeking advice from experienced individuals before starting the project can significantly improve your results. For instance, learning how to properly apply joint compound or sanding techniques can make a substantial difference in the final outcome of your repair. Incorporating these best practices not only ensures better results but also boosts your confidence in tackling the project.
Educating yourself about common mistakes is equally important when undertaking DIY drywall repair. Being aware of pitfalls and errors helps you avoid making similar blunders during the process. By learning from others’ experiences, you can save time, money, and frustration in the long run. For example, understanding why certain repairs failed due to improper preparation or incorrect materials empowers you to steer clear of those same missteps. Educating yourself about common mistakes ultimately improves the success rate of your own repairs.
Conclusion
You’ve now seen the potential pitfalls of DIY drywall repair and the importance of recognizing when it’s time to call in a professional. Understanding the risks, identifying poor work, and prioritizing health and safety are crucial in this process. Remember, effective drywall repair goes beyond just aesthetics; it ensures structural integrity and safeguards your well-being.
As you tackle drywall repair, keep in mind the dos and don’ts we’ve covered. But if you encounter significant damage or feel uncertain at any point, don’t hesitate to reach out to a qualified professional. Your home deserves the best care, and sometimes that means bringing in the experts.
Is Your Home in Need of Expert Drywall Repair?
Introducing PaintMasters, Concord, California’s premier professionals in home renovation and drywall repair. Since 1994, we’ve been revitalizing living environments, from cozy residences to dynamic commercial spaces. Our approach to drywall repair goes beyond mere patchwork; it’s about meticulously preparing your space for a seamless and polished finish. Equipped with advanced tools and techniques, we ensure results that are not only visually appealing but also enduring.
At PaintMasters, our services extend beyond basic fixes. We provide comprehensive solutions that include thorough preparation processes such as sanding, sealing, and precise drywall repair, ensuring your walls are impeccably restored before any further work is done. Our skilled team, with their extensive experience in various aspects of home renovation, is dedicated to rejuvenating and transforming your space, giving it a fresh and renewed appearance. We’re committed to achieving excellence from the outset, offering you a smooth and satisfying home renovation experience.
Are you prepared to revitalize your home with expert drywall repair? At PaintMasters, we’re not just about fixing walls; we’re about creating an atmosphere of quality and sophistication. Contact us today to embark on your journey to a beautifully restored home. Let’s collaborate to bring your vision to life, creating spaces that exude style and grace. Discover the PaintMasters difference – where every repair is a step towards excellence. Reach out now to start the transformation of your home!
